|
|
Curriculum Authoring - Create and Publish Folders to District Resources |
Create and Publish Curriculum Folders
For Curriculum Authors and Curriculum Managers.
Teachers only see what’s in a published folder. Build in unpublished folders, then publish each top-level folder when it’s ready. The top-level folder’s name is what teachers see in District Resources, so name it clearly (Grade 6 Math, Module Tests).
Create a folder
- Go to Administration > Curriculum Authoring and open your District Resources list.
- Click New Folder.
- Type a Folder Name, pick a Color, and click Confirm.
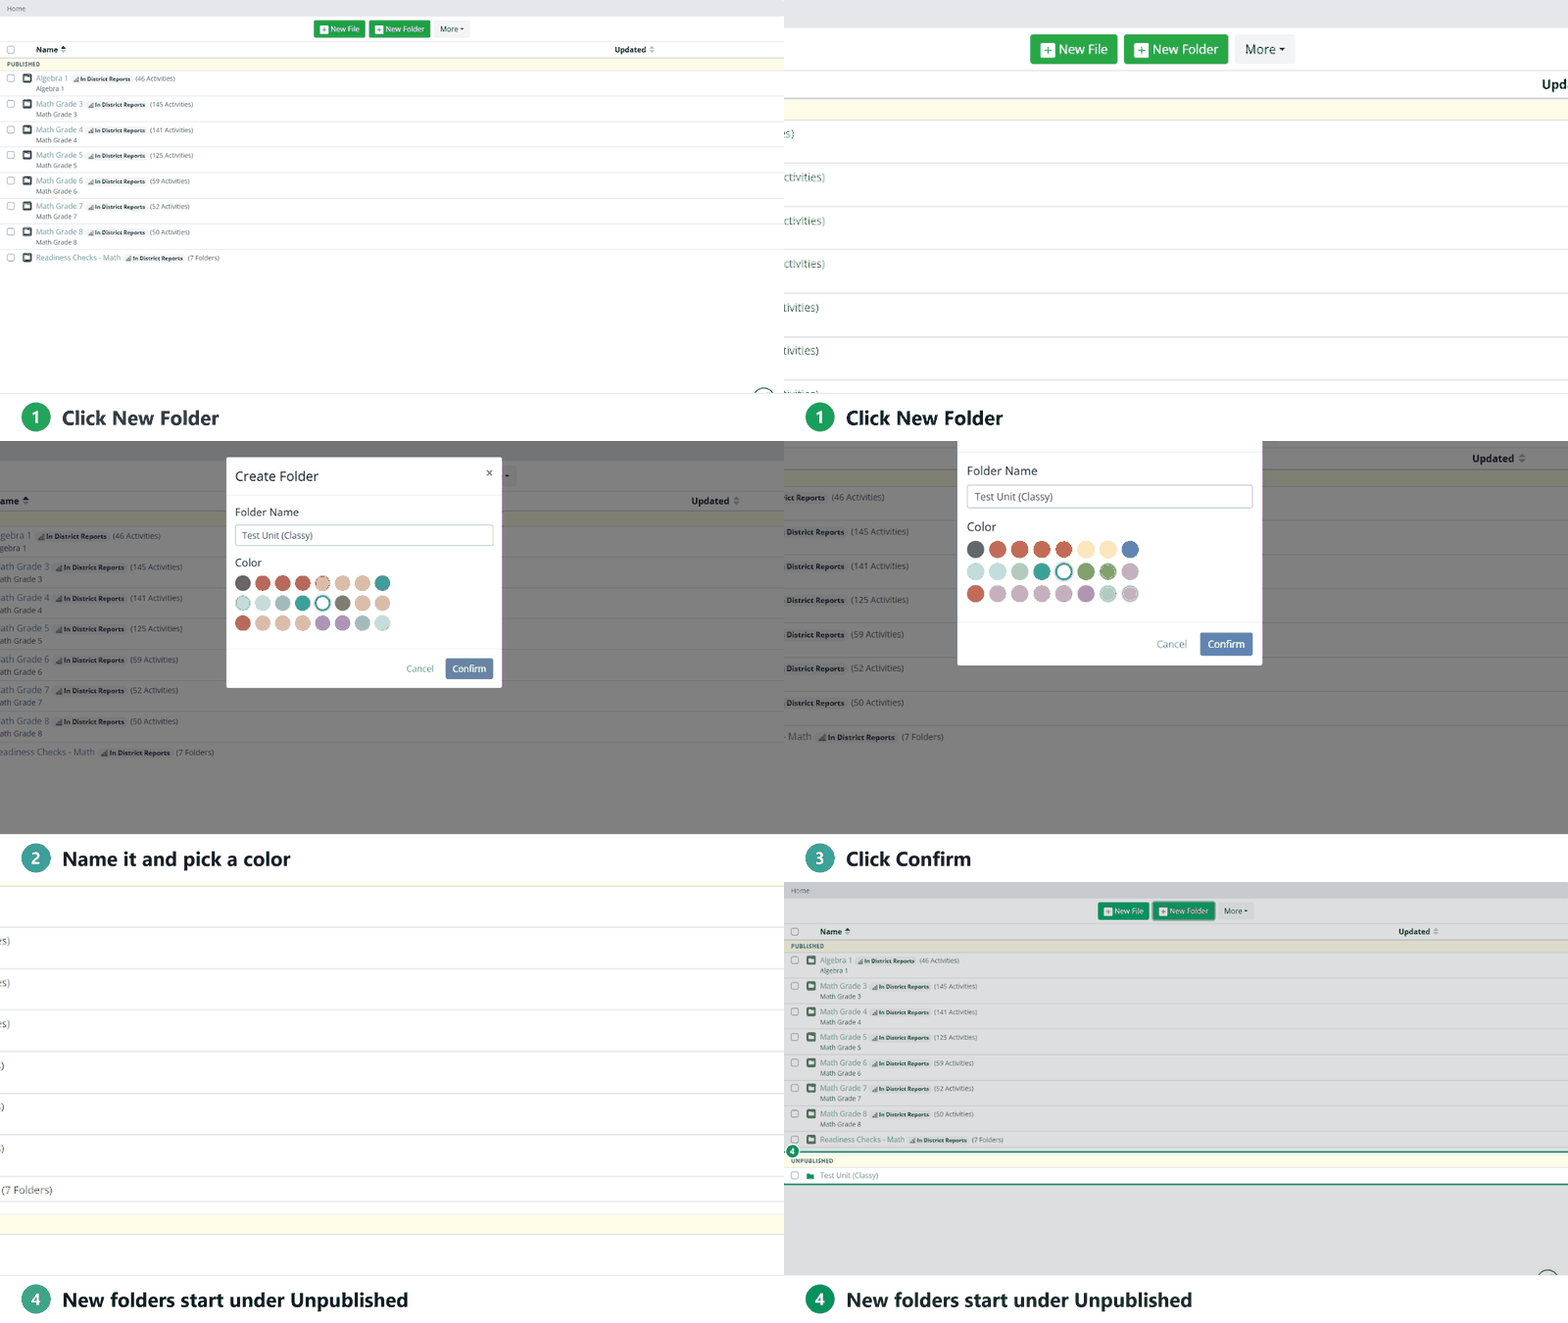
Open the folder to add activities (New File) or subfolders (New Folder), such as one per module.
Publish a folder
- Check the box next to the folder.
- Click Publish in the bar that appears.
- Click Confirm. The folder and everything in it become available to all teachers in your organization.
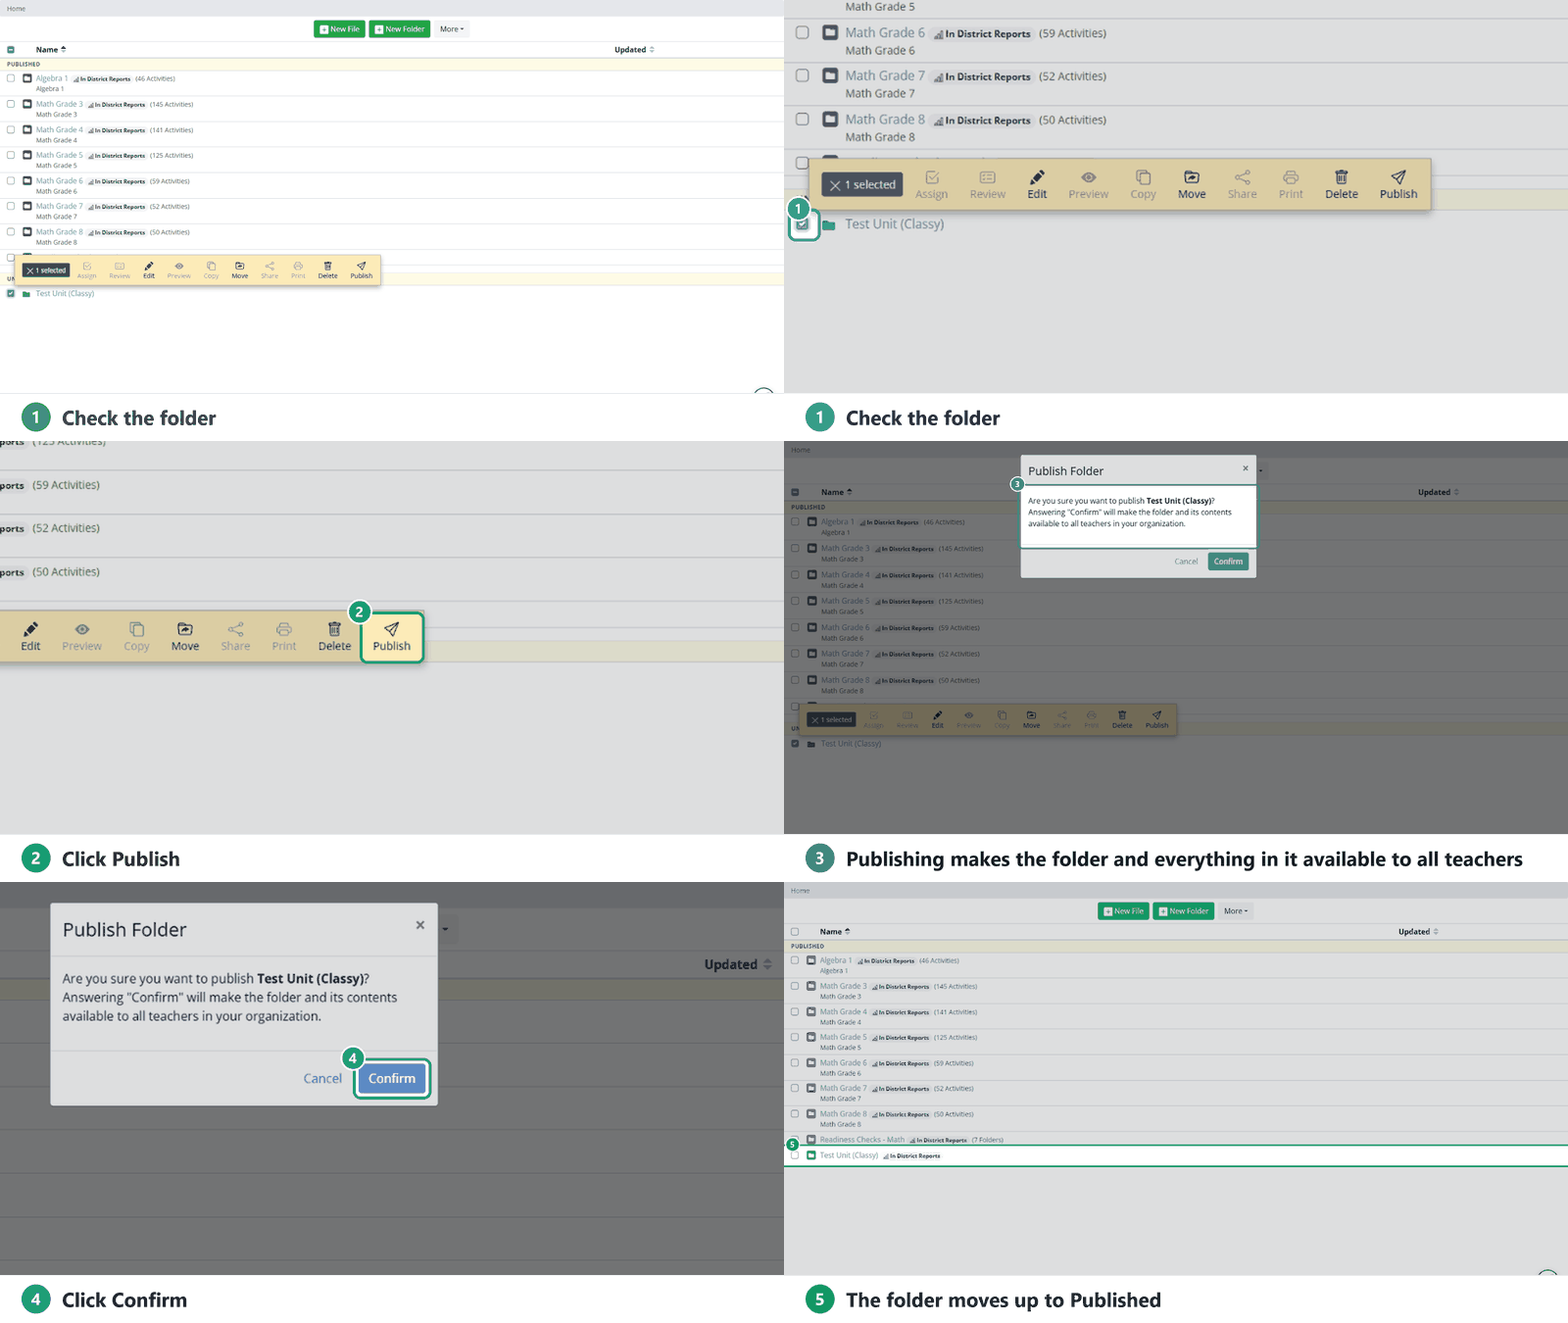
You publish top-level folders, not single activities: an activity reaches teachers by being inside a published folder.
Unpublish a folder
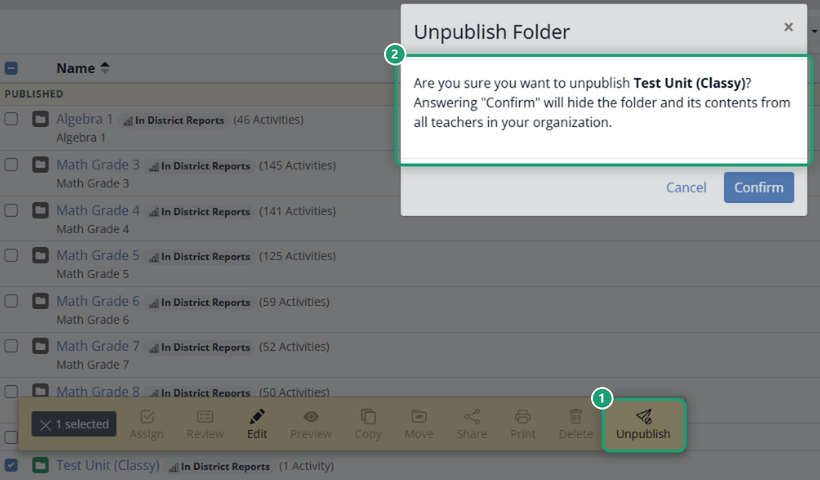
Check the published folder and click Unpublish, then Confirm. The folder and its contents are hidden from all teachers right away. Use this for big revisions or to retire old materials.
Move folders and activities
- Check the folder or activity.
- Click Move, pick the destination folder, and click Confirm.
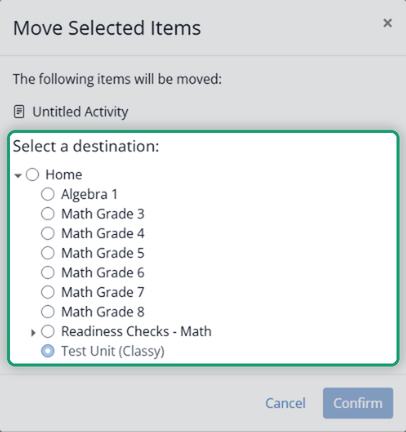
- Moving something into a published folder makes it available to teachers right away; moving it into an unpublished folder hides it.
- A published top-level folder can’t be moved. Unpublish it first.
Rename a folder or change its color
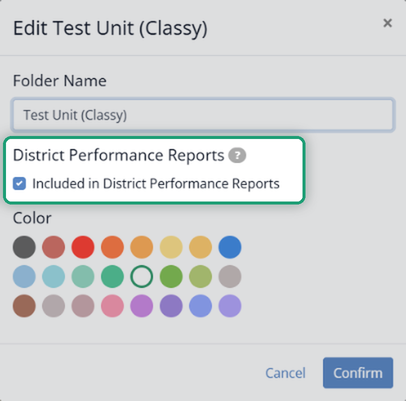
Check the folder and click Edit. You can change the name and color. The Included in District Performance Reports box is checked to start; published folders that count show In District Reports next to their name.
Delete a folder
Check it and click Delete, then Confirm Delete. Deleting a folder deletes the activities inside it, and their assignments and submissions stop being available. This can’t be undone. A published folder with activities in it can’t be deleted until you unpublish it.
Tips
- Group folders the way teachers look for them: by school, subject, grade or assessment type.
- Keep drafts in unpublished folders until they’re finished.
Related
Was this article helpful?
That’s Great!
Thank you for your feedback
Sorry! We couldn't be helpful
Thank you for your feedback
Feedback sent
We appreciate your effort and will try to fix the article