|
|
Coaching: Set Up PLCs and Observe a PLC |
Coaching: Set Up PLCs and Observe a PLC
Coaching is available only if your district has purchased the Texas OER Math or RLA Companion.
Support your professional learning communities (PLCs) in Coaching: create a PLC and pick its facilitator, choose the PLCs you support, and log a PLC Observation when you watch one meet.
New to Coaching? Start with Coaching: Get Started and Set Up Coaching.
Create a PLC
If the PLC already exists, skip to Choose the PLCs you support.
- On the Coaching page, click Set Up Coaching, then the PLCs tab.
- Click Set Up PLCs.
- Type a Team name and, under Assign to, pick the campus (or District-wide).
- Check the PLC’s Subjects and Grades.
- Under Members, check the teachers in the PLC. Use the search box to find someone.
- Check Facilitator next to the member (or members) who will lead the PLC. Facilitators plan and run the PLC’s meetings.
- Click Create PLC.
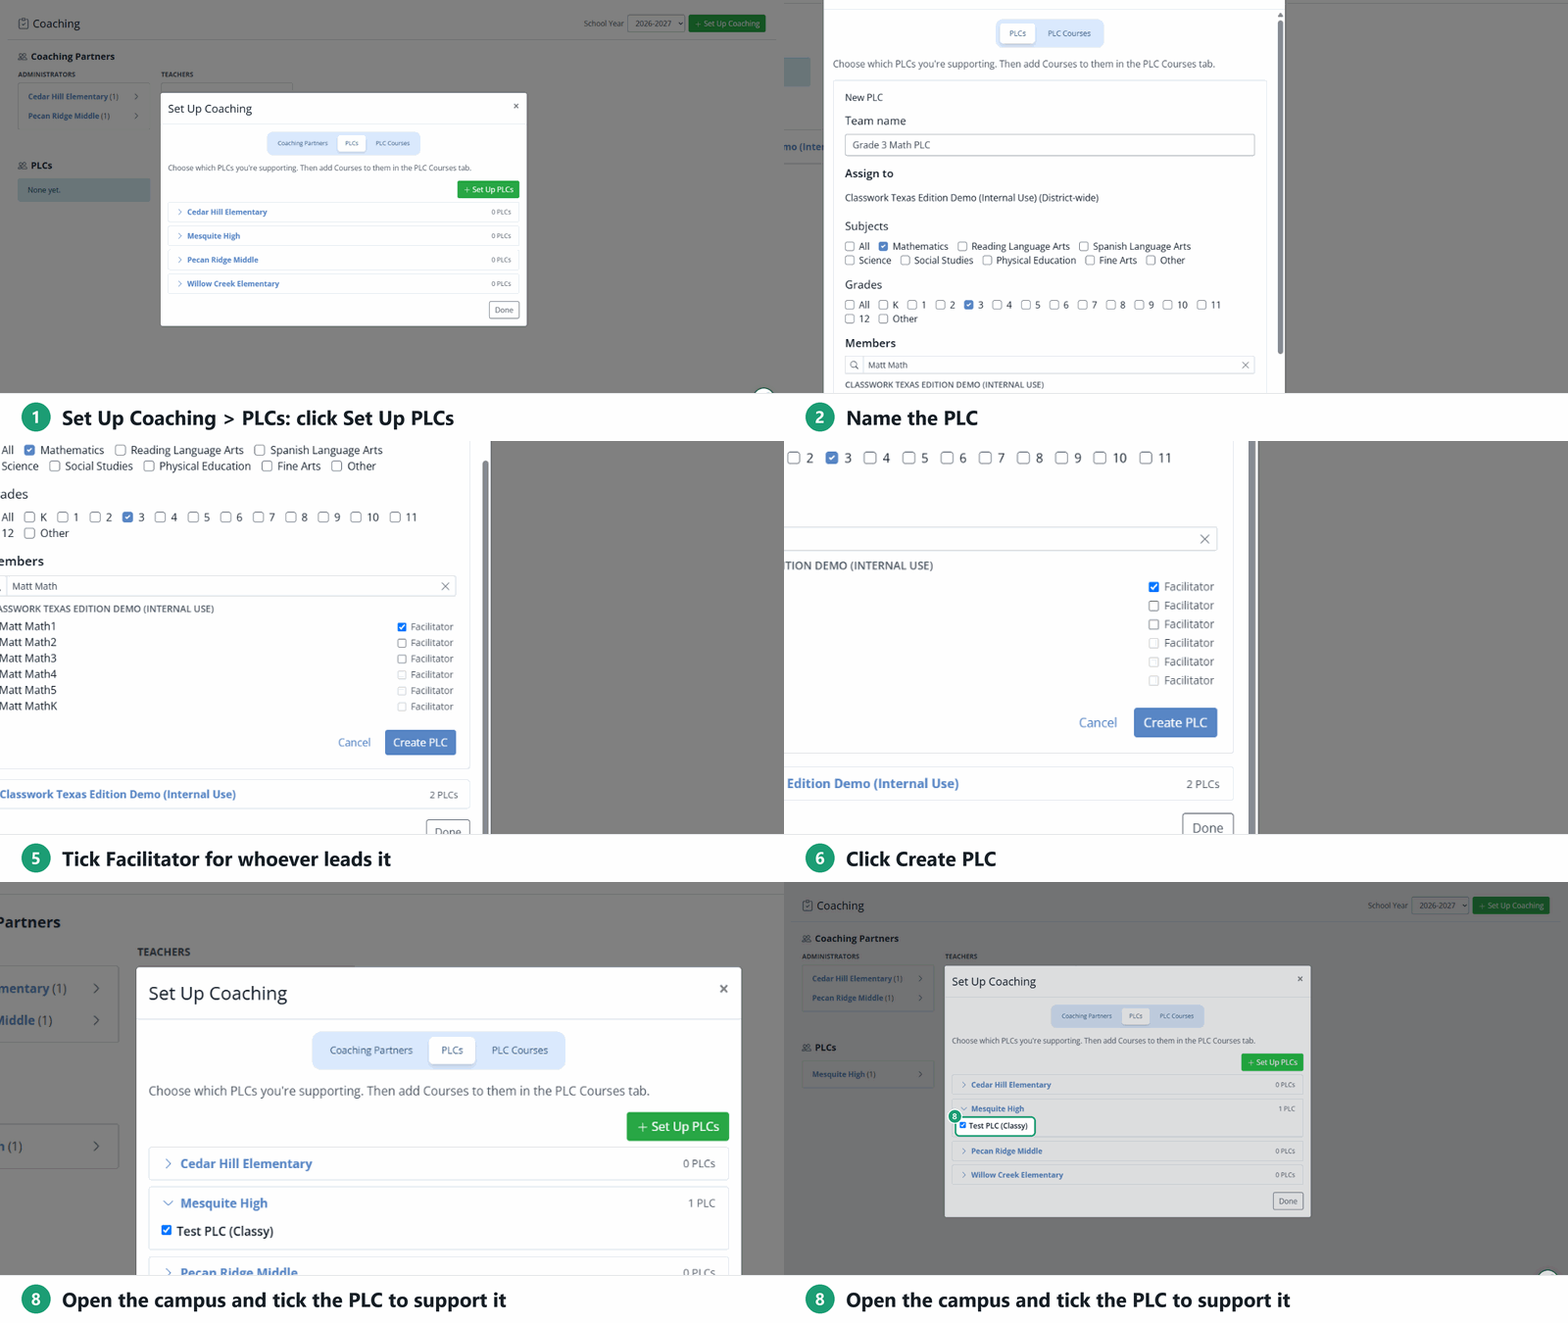
You’ll see PLC set up. Tick it below to start supporting it. Creating a PLC doesn’t add it to your Coaching page yet: tick it as in the next step.
PLCs are also teams. A User Administrator can see, edit and delete them, and change facilitators, in Administration > Users > Manage Teams (see Create and Manage Teams).
Choose the PLCs you support
On the PLCs tab, open a campus and tick each PLC you support. Each tick saves right away. You don’t have to be a member of a PLC to support and observe it.
Careful: unticking a PLC also clears the courses you added to it. If you tick it again, add its courses again.
Add the PLC’s courses
- Open the PLC Courses tab.
- Pick the PLC.
- Click each course it works on: Mathematics (Grade K–8, Algebra I, Algebra II, Geometry) or RLA (Grade K–5). Click a course again to remove it.
- Click Done.
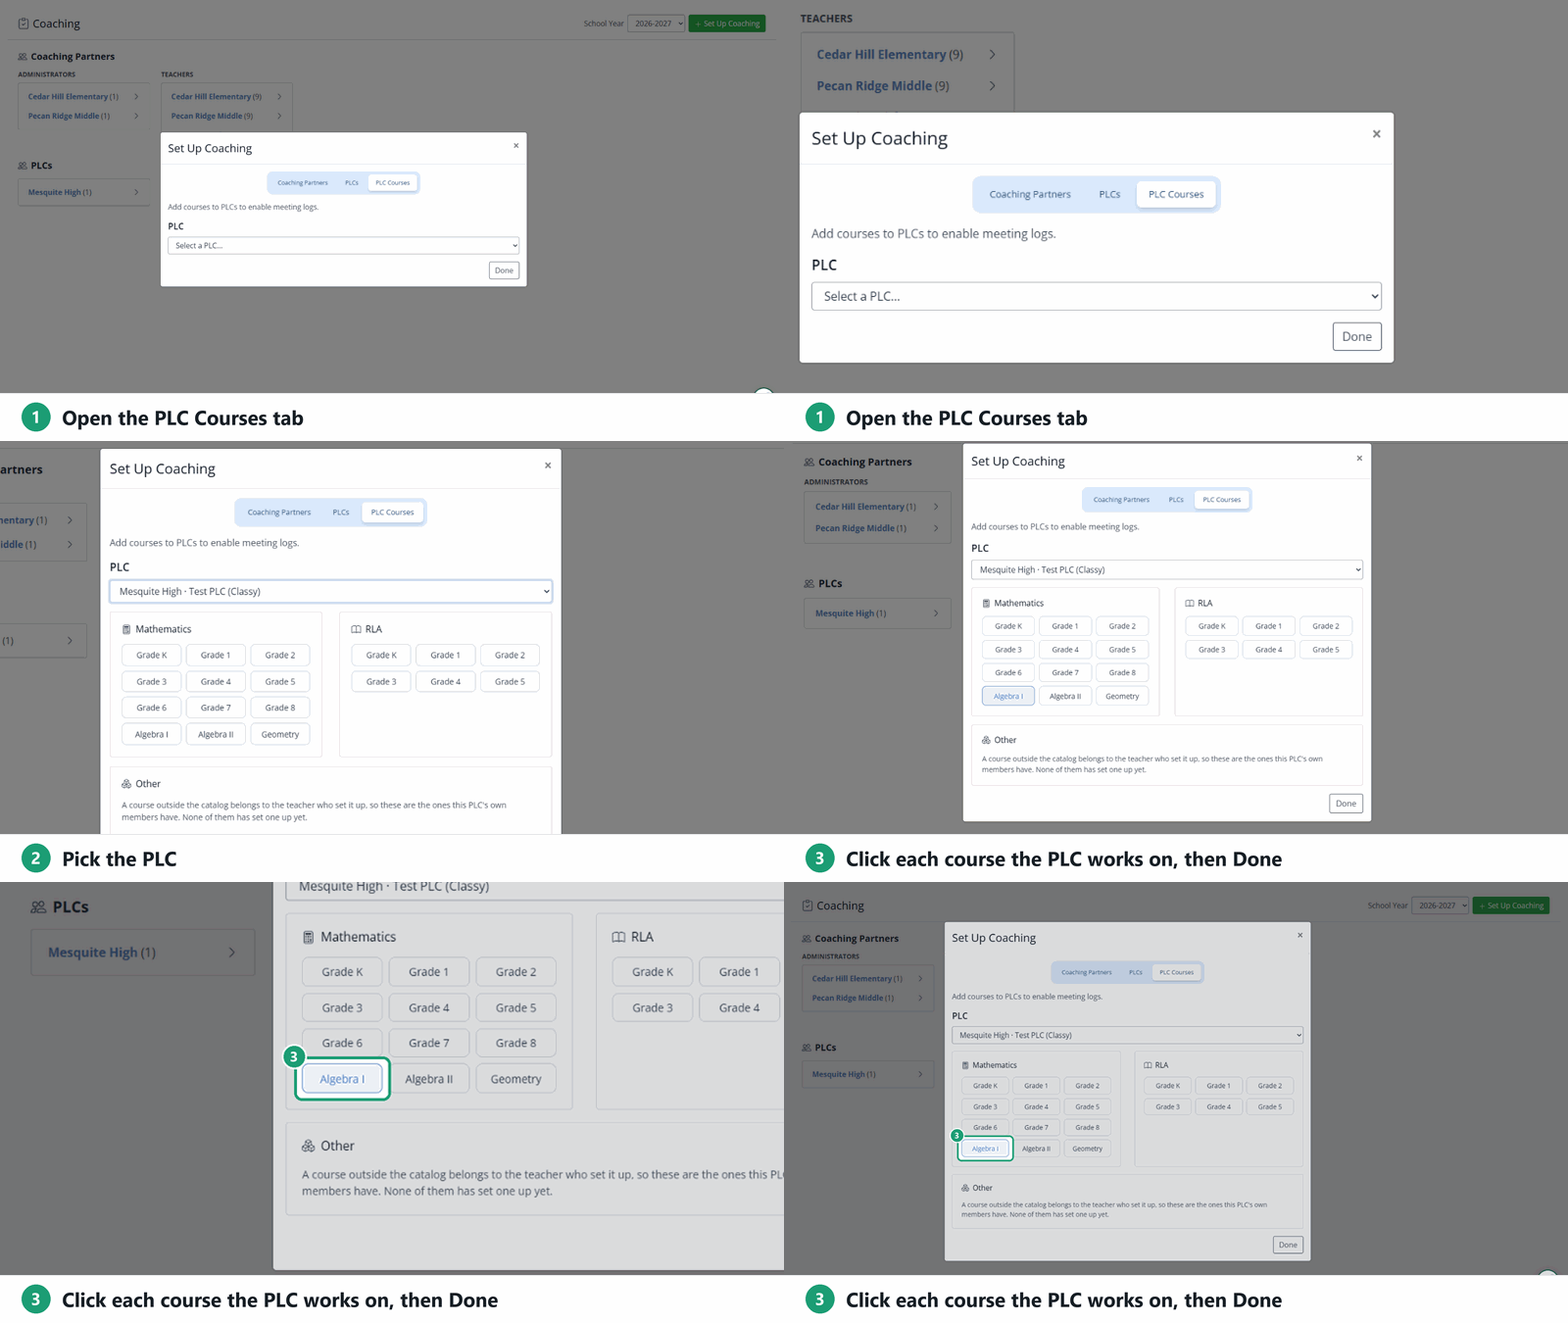
Under Other you’ll see any courses the PLC’s own members set up themselves.
Observe a PLC
- On the Coaching page, under PLCs, open the campus and click the PLC.
- Under PLC Observations, click Add Observation.
- PLC Facilitator Name/Role: pick one of the PLC’s facilitators, or type the name of someone from outside it. Check the Observation Date, then fill in Grade Level/Content Area and Unit/Lesson.
- Click Add Observation Form and pick what the PLC worked on: Unit/Module Internalization, Lesson Internalization, Lesson Rehearsal or Student Work Analysis. Add more than one form if the meeting covered more.
- Rate each indicator N/A, 0 No, 1 Partial or 2 Yes, and add notes.
- Post-Observation Debrief: write the Praise and the Area of Growth.
- Action Step: pick one PLC Best Practices action step for the facilitator (or None), and check the microsteps to focus on. The facilitator sees it on the PLC’s page.
- Observer’s Private Notes: hidden from the facilitator; only coaches and district administrators see them.
- Click Submit Observation.
A submitted observation shows Completed on its date and can’t be edited.
Older PLC logs
PLC logs from before PLC Observations (one per module) still show below the observations, under PLC Logs. You can open them, but you can’t add new ones.
Related
- Coaching: Log a Coaching Meeting
- Coaching: Use the Lesson Log Report: PLC observations show there with the type PLC Observation.
Was this article helpful?
That’s Great!
Thank you for your feedback
Sorry! We couldn't be helpful
Thank you for your feedback
Feedback sent
We appreciate your effort and will try to fix the article