|
|
Flex Editor Overview |
Flex Editor Overview
The Flex Editor is Classwork’s item-based activity builder. Instead of drawing answer boxes on top of an uploaded document (the way the Slide Editor works), you build an activity from items: passages, images, audio, video, web pages and question types that Classwork scores for you. Items resize to fit any screen, and each one can carry a standard, a Bloom’s level and a Webb’s DOK level.
Want the full comparison first? See Slide Editor vs. Flex Editor.
Open the Flex Editor
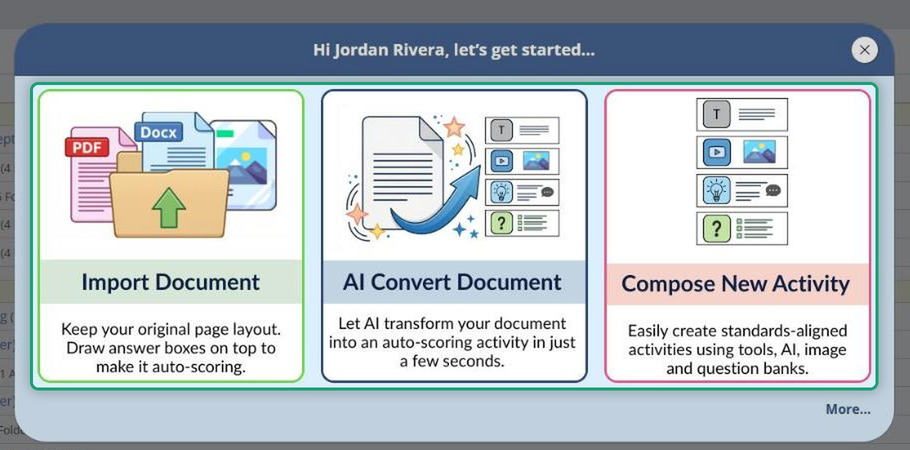
On the Activities page, click + New File and choose:
- Compose New Activity: opens an empty Flex activity to build from scratch with tools, AI and item banks.
- AI Convert Document: upload a document and AI turns it into an auto-scoring Flex activity.
The third card, Import Document, opens the Slide Editor instead. AI Convert Document is available on School and District licenses; Trial and Pro Individual accounts see Import Document and Compose New Activity only.
To open an existing Flex activity, click its name on the Activities page (Flex activities have a small icon next to the name), then click Edit Content.
The editor at a glance
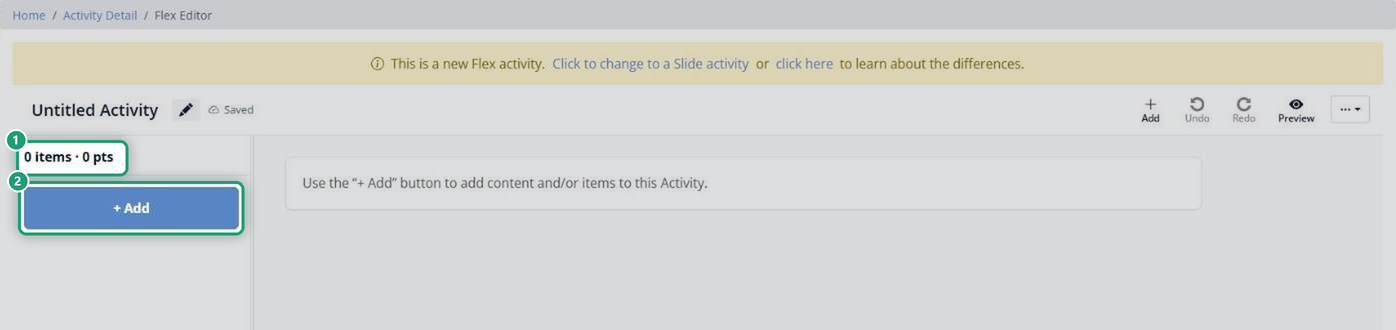
- Item list (left): every item in order, with a running count of items and points, and a + Add button.
- Workspace (center): the items themselves, where you edit them.
- Toolbar (top right): + Add, Undo, Redo, Preview and the … (More options) menu.
Your work autosaves. To leave the editor, click Activity Detail in the breadcrumb at the top. On a brand-new activity, a yellow banner offers Click to change to a Slide activity if you’d rather build it in the Slide Editor.
Add content and items
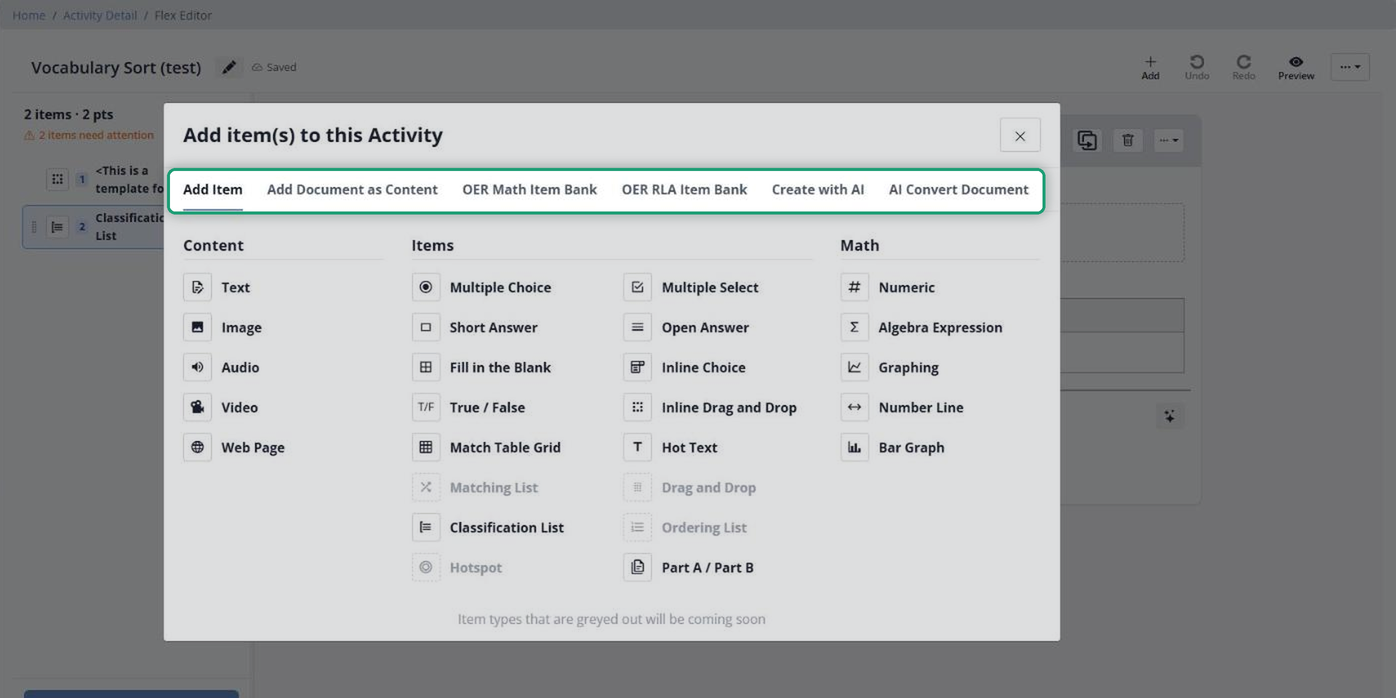
Click + Add to open Add item(s) to this Activity. Its tabs:
- Add Item: the item picker (below).
- Add Document as Content: bring in a PDF or stimulus to show as content. You can’t draw answer boxes on it; add question items instead.
- OER Math Item Bank and OER RLA Item Bank: ready-made Texas OER questions, for Texas organizations with the matching Companion.
- Create with AI: generate passages and questions.
- AI Convert Document: convert a document into items (School and District licenses).
On the Add Item tab, pick from three columns:
- Content: Text, Image, Audio, Video, Web Page.
- Items: Multiple Choice, Multiple Select, Short Answer, Open Answer, Fill in the Blank, Inline Choice, True / False, Inline Drag and Drop, Match Table Grid, Hot Text, Part A / Part B, Classification List.
- Math: Numeric, Algebra Expression, Graphing, Number Line, Bar Graph.
Greyed-out types (Matching List, Drag and Drop, Ordering List and Hotspot) are coming soon. For step-by-step help, see Adding Items (Flex Editor).
Build and arrange items
- Edit an item: click Edit on it to open its window (prompt, answer choices, correct answer, settings), then click Save.
- Points: click the points button at the top of a question (it starts at 1 Point).
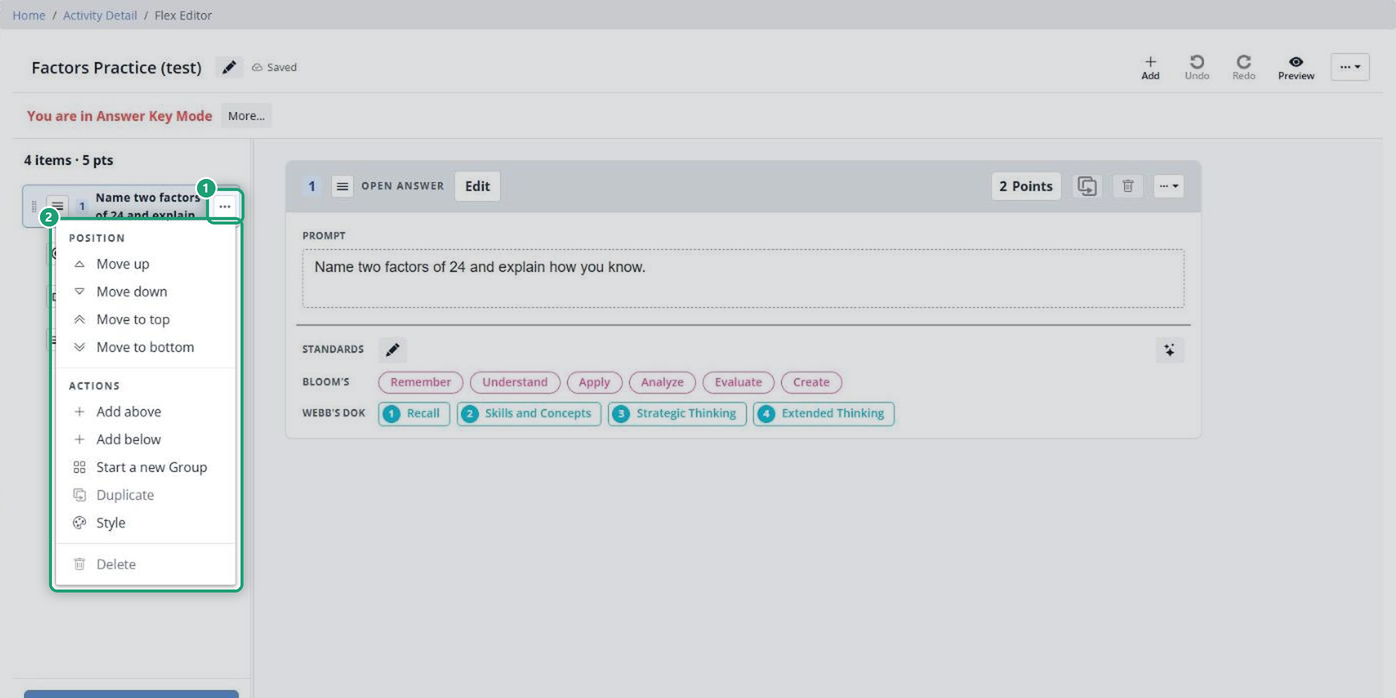
- Move, duplicate or delete: click the … on an item (in the item list or on the item) for Move up, Move down, Move to top, Move to bottom, Add above, Add below, Start a new Group, Duplicate, Style and Delete. You can also drag an item by its handle in the item list.
- Something missing? An item that isn’t finished (for example, one with no prompt or no correct answer) is flagged in the item list, which shows how many items need attention.
Tag standards, Bloom’s and Webb’s DOK
Each item has a Standards pencil, a row of Bloom’s levels (Remember to Create) and a row of Webb’s DOK levels (1 to 4). Set them yourself, or click the AI (sparkle) button on an item to have Classwork suggest them: choose the subject and grade, pick which ones to add, and decide whether to replace or combine an existing standard. Then click Continue.
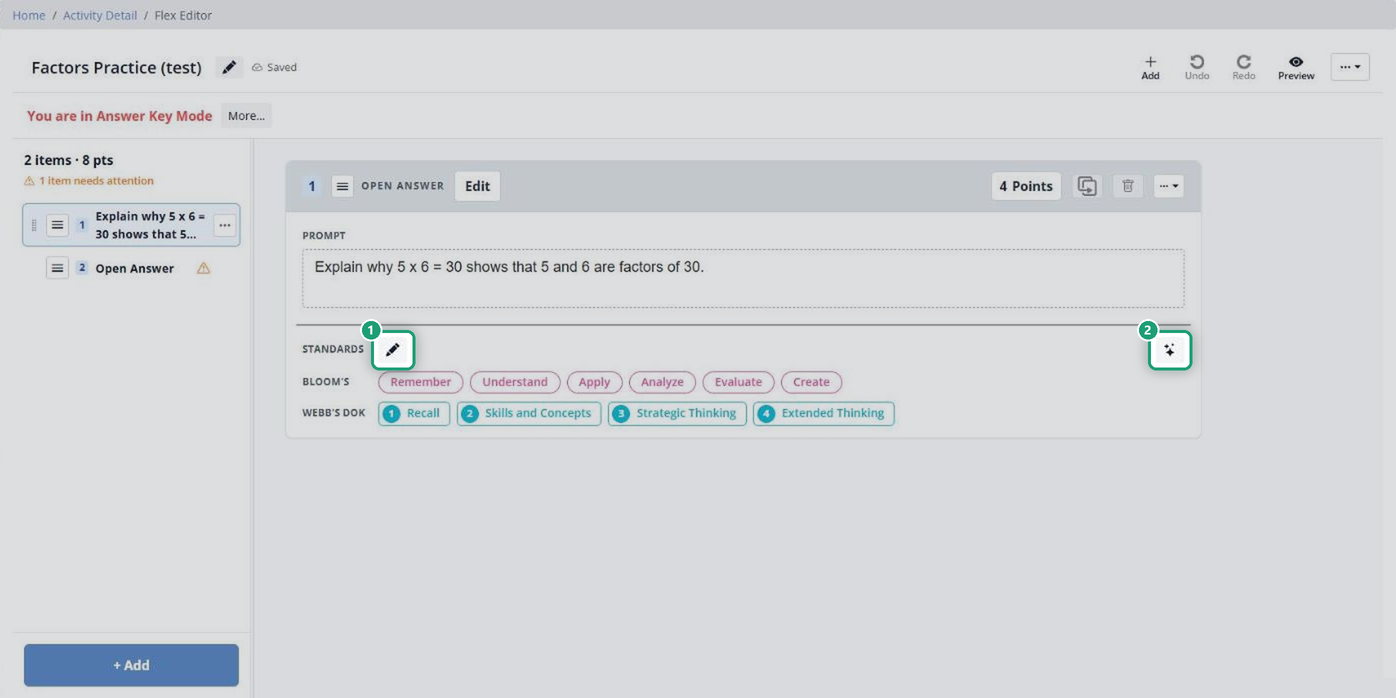
To tag the whole activity at once, open the … menu at the top right and choose AI Standard Tagging. You can run it on every item, or only on items still missing a standard, Bloom’s or DOK.
Group items and Split Screen
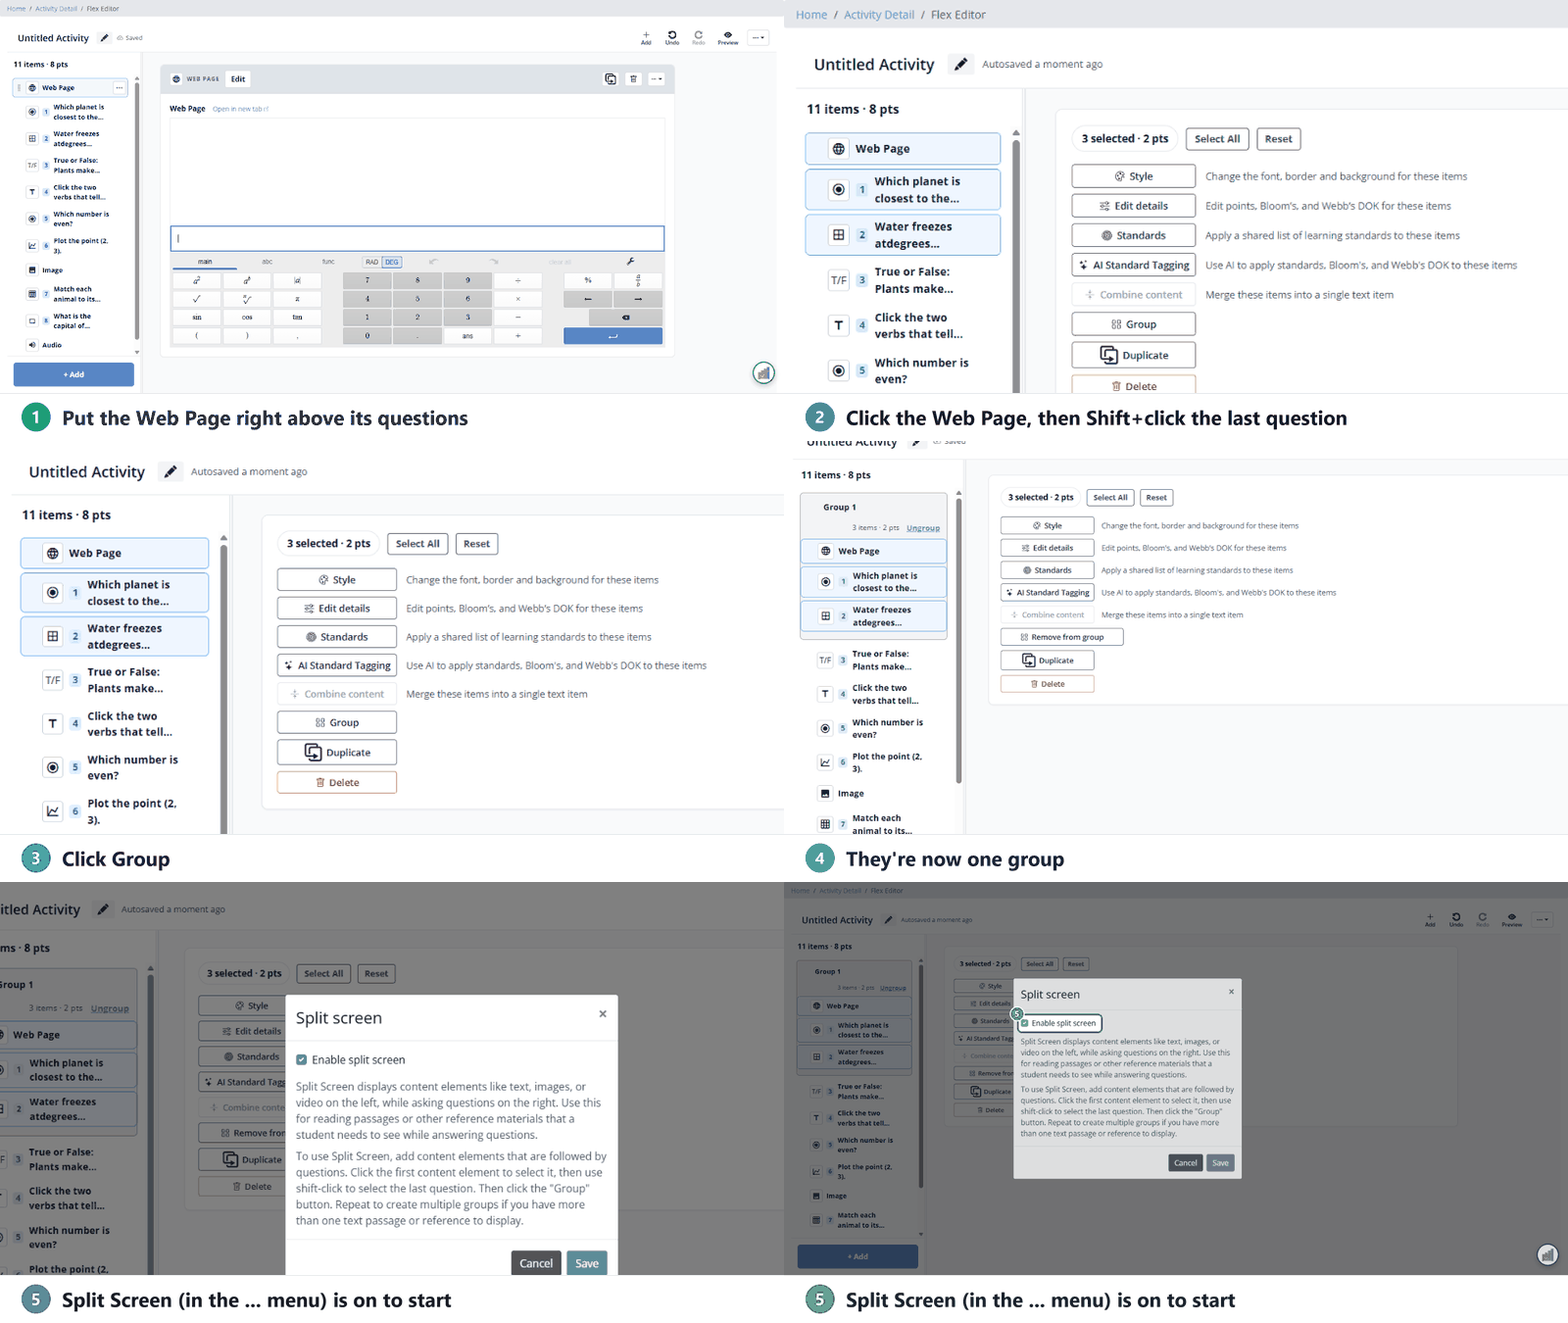
When several questions share one stimulus (a passage, image or map), group them so they stay together. Click the … on the stimulus in the item list and choose Start a new Group, then move its questions into the group. You can also hold Shift, click each item, and click Group.
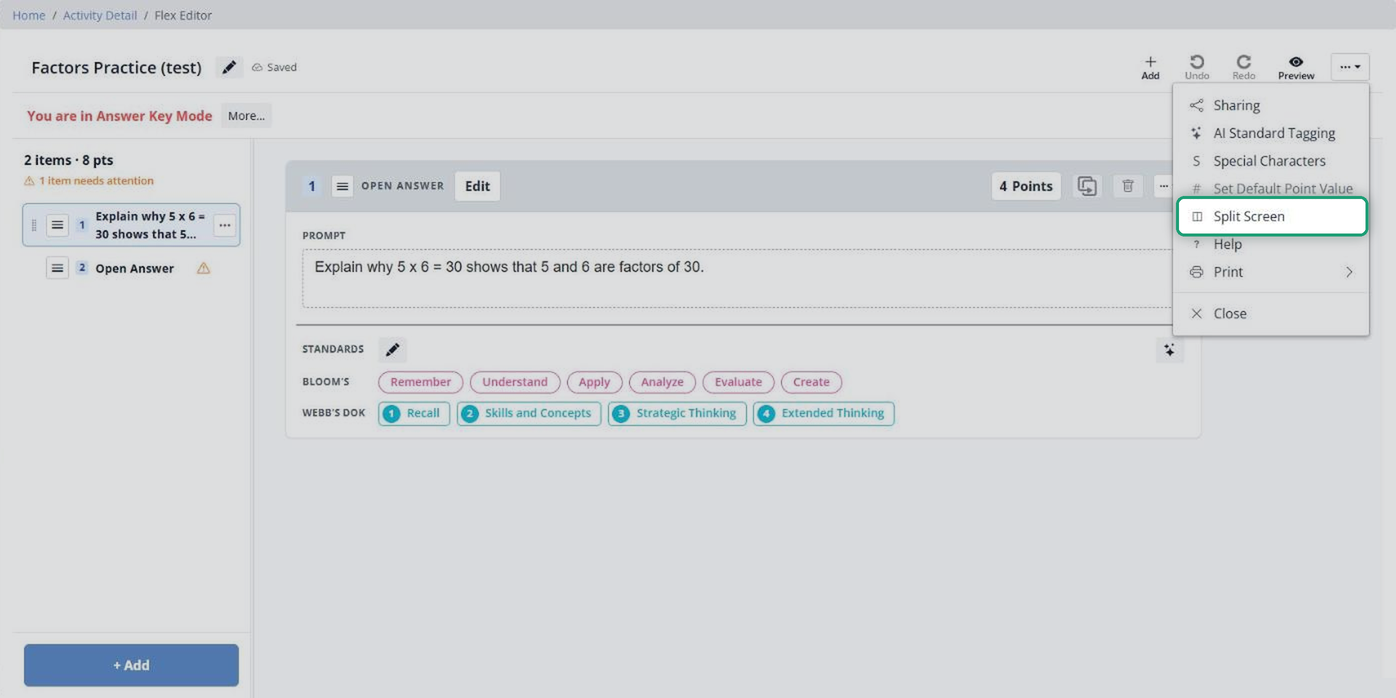
Split Screen is on by default: a group shows side by side, with the stimulus pinned on the left and the questions on the right. To turn it off so grouped items simply stack, open the … menu, click Split Screen, uncheck the box and click Save. Split Screen only affects grouped items. See Split Screen in the Flex Editor.
Work with several items at once
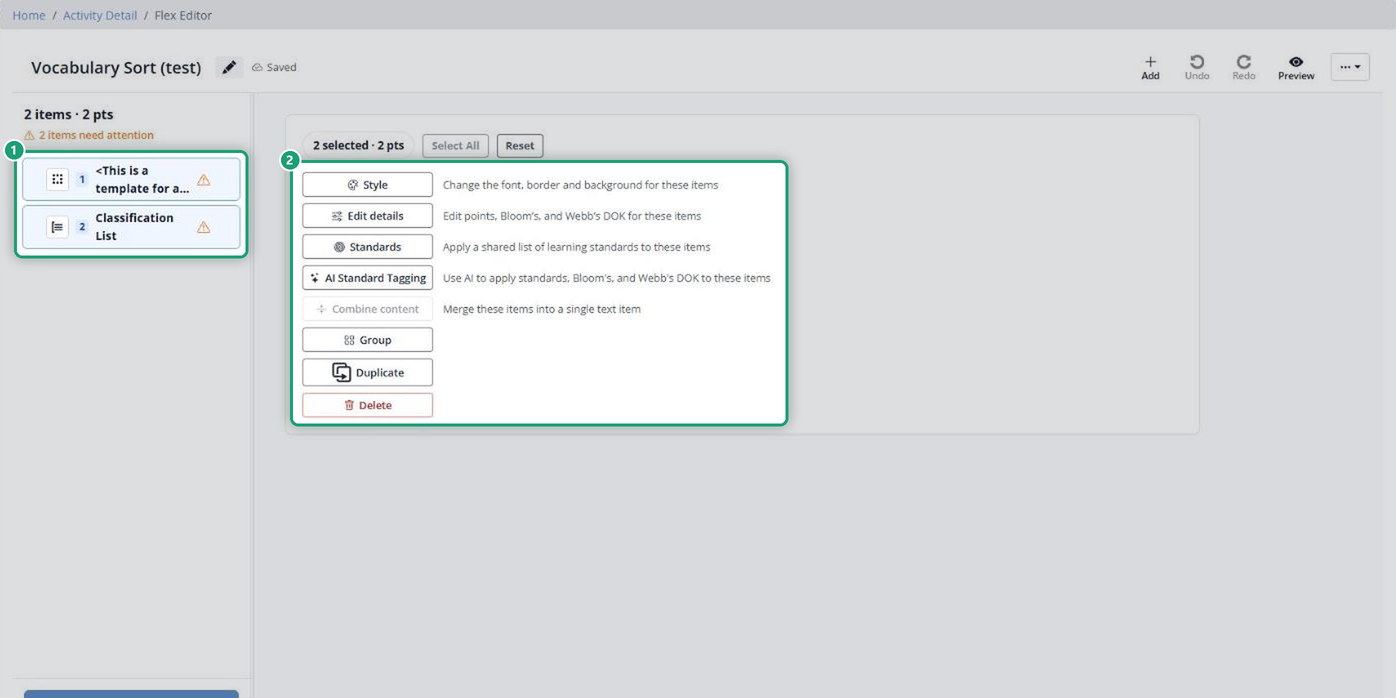
Hold Shift and click items to select them. The panel that appears can Set font, Edit details (points and standards), Style (font, background and border), Group, Duplicate or Delete the whole selection. Select All picks every item.
More tools and Preview
The … menu at the top right holds Sharing, AI Standard Tagging, Special Characters, Set Default Point Value, Split Screen, Help, Print and Close.
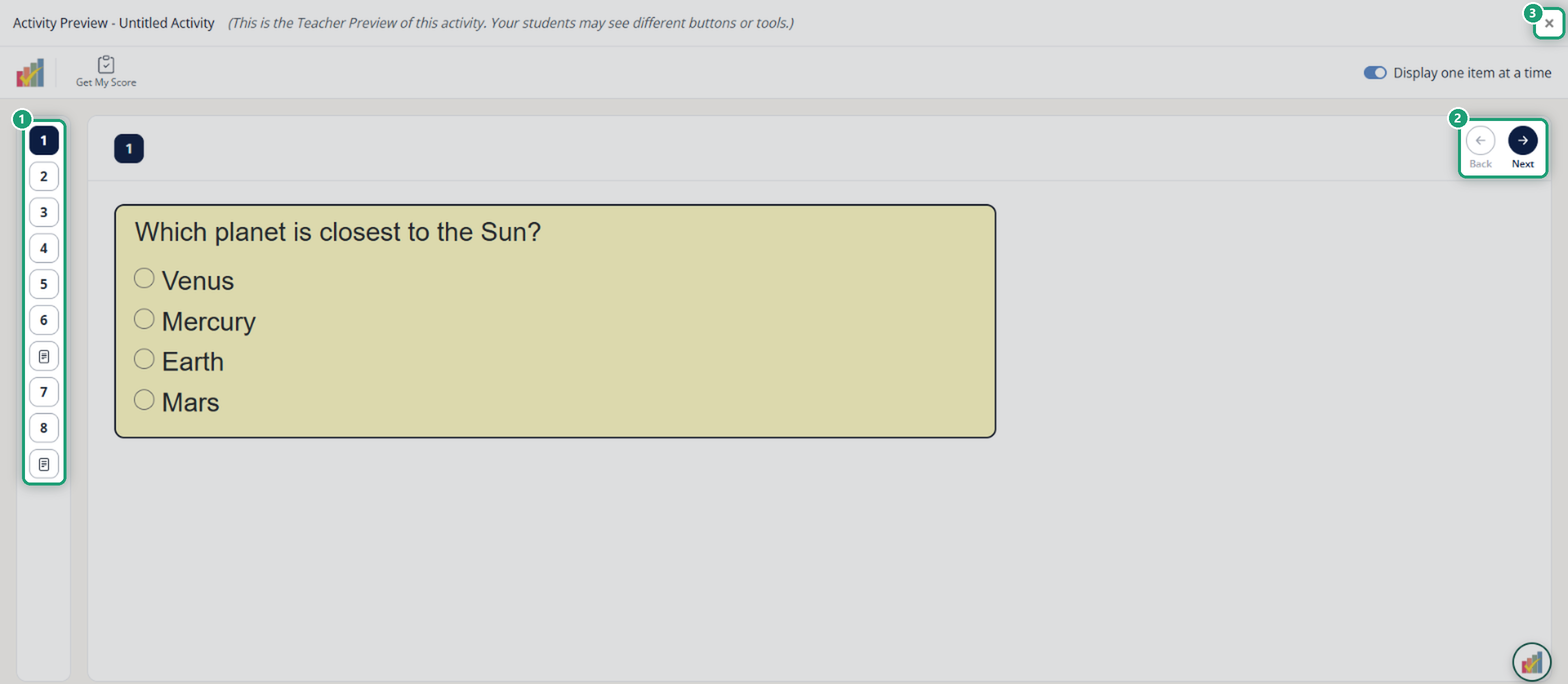
Click Preview at any time to try the activity as a student would. Use Back and Next or the item numbers to move around, then Close.
After you assign
Once an activity is assigned, the editor opens in Answer Key Mode. You can fix correct answers, choices and typos, change points and add teacher content, but you can’t add or delete questions. To make bigger changes, copy the activity and edit the copy. See Edit Your Answer Key After Assigning or While Grading Assignments.
Related articles
Was this article helpful?
That’s Great!
Thank you for your feedback
Sorry! We couldn't be helpful
Thank you for your feedback
Feedback sent
We appreciate your effort and will try to fix the article