|
|
Curriculum Pacing: Add Events to Your Calendar |
Curriculum Pacing: Add Events to Your Calendar
This article applies only to Curriculum Managers. It’s part of Curriculum Pacing for Curriculum Managers.
Events let you log what’s happening on a specific day, such as a testing window, field trip, or assembly.
For each event, you choose whether a lesson is still taught that day. If it isn’t, the lesson moves to the next instructional day and the rest of the calendar reflows.
Add an Event
- Open the course in Curriculum Pacing (Administration › Organization Info › Curriculum Pacing).
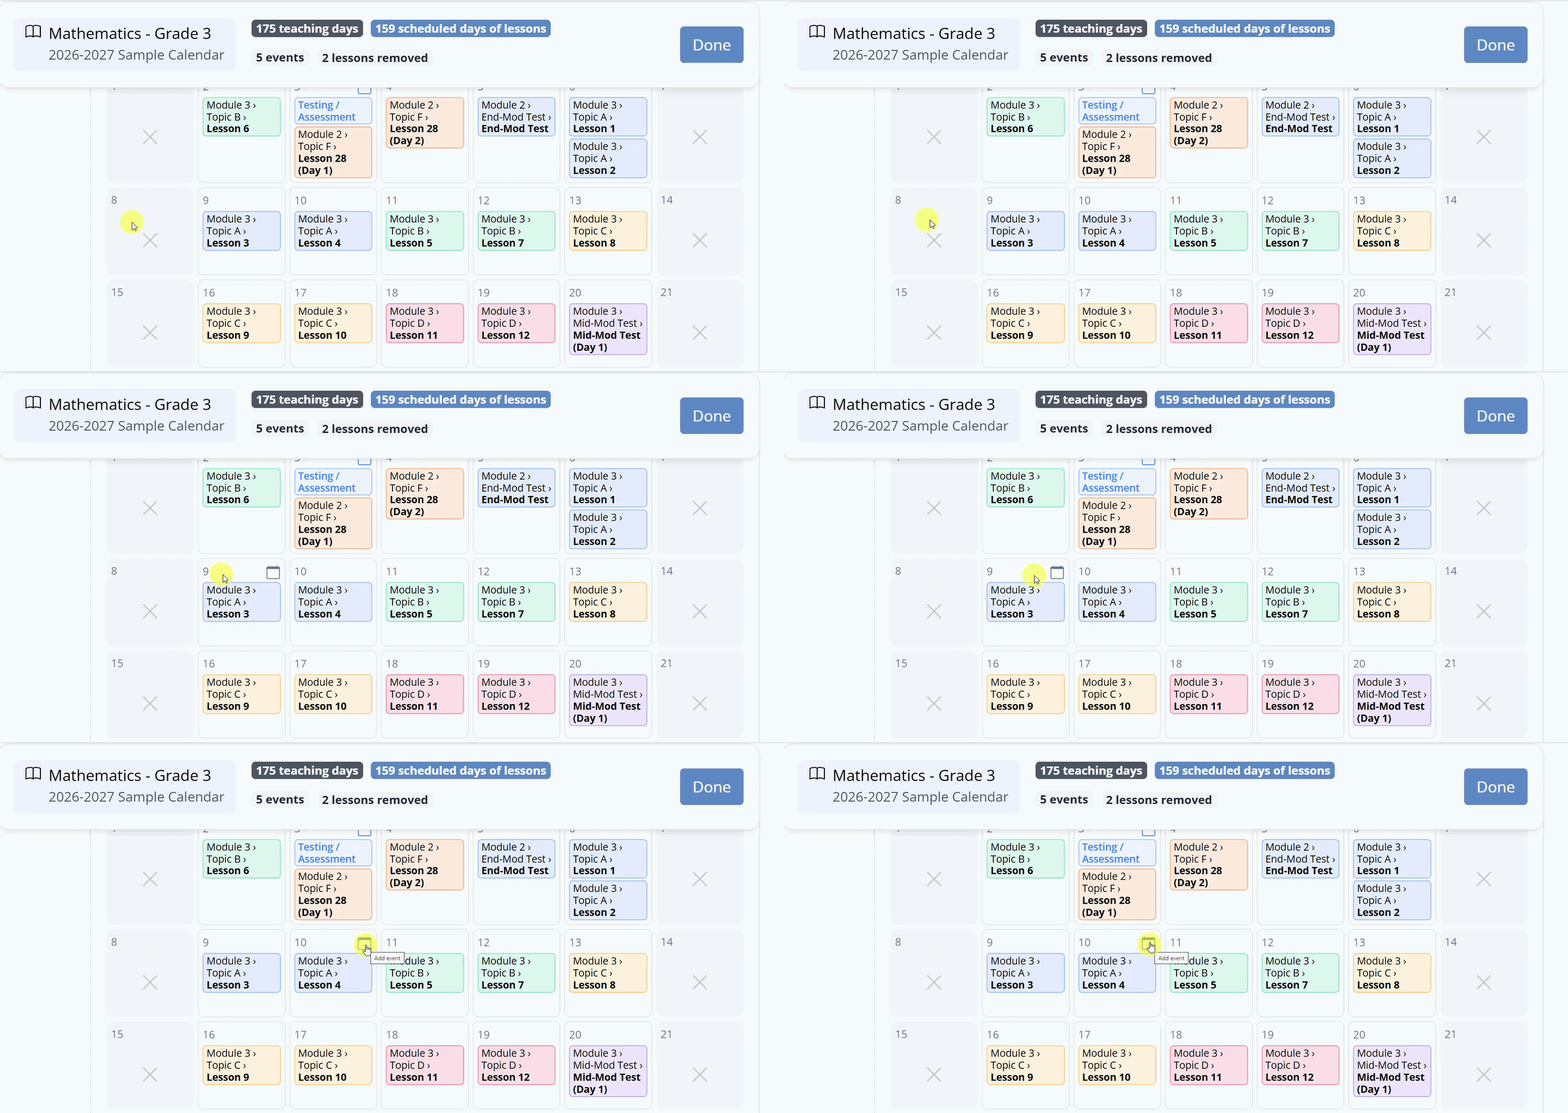
- Hover over the day you want. A small calendar icon appears in the upper right corner of the day.
- Click the calendar icon. The Add an Event window opens for that date.
- Choose whether to teach a lesson this day (see below).
- Select the Type of Event.
- Optionally, add a Description.
- Optionally, apply the event to other courses (see below).
- Click Save event.
Event Types
Choose the type that best describes the event:
- Testing / Assessment
- Field Trip
- Professional Development
- Assembly / Event
- Review / Catch-up
- Other
The description is optional, and it’s a good place to note details such as “State testing, Grade 3” or “Bad weather.” It appears with the event on the calendar.
Teach a Lesson This Day?
This is the most important choice in the window. It tells Classwork whether the event takes the place of the day’s lesson.
- Yes: The event is logged on the day, and the lesson is still taught. Nothing else on the calendar moves. Use this for events that don’t disrupt instruction.
- No: The day is removed from the calendar, the lesson scheduled for that day moves to the next instructional day, and every lesson after it shifts forward. Use this when the event replaces the lesson, such as a testing day or a field trip.
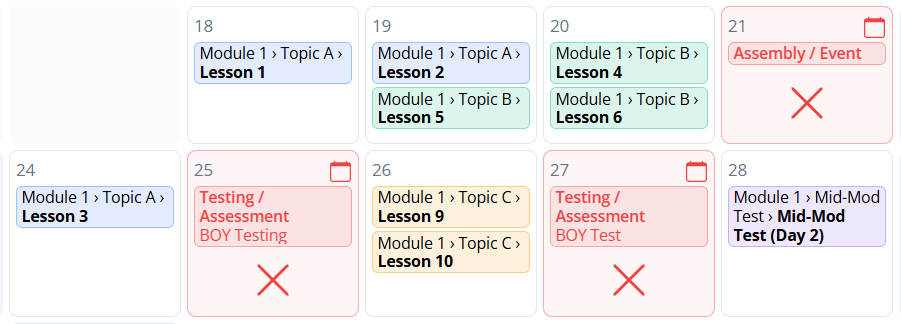
A day where you chose No is marked with a big X on the calendar, just like a non-instructional day.
Apply an Event to Other Courses
By default, an event affects only the course you’re editing. The window tells you so:
This event will affect only Mathematics – Grade 3.
If the event touches other courses too, such as a schoolwide assembly, select them under Add this event to other courses. Courses are listed by subject. Check each one that applies, or click Check all to select every course. The message at the bottom updates to show how many courses the event will affect.
This saves you from adding the same event to each course’s calendar one by one.
See Your Event on the Calendar
Once saved, the event appears on the day as a labeled chip showing its type, along with your description. When a lesson is still taught that day, the chip sits above the lesson. The count of events in the calendar header goes up by one, and the calendar saves automatically.
Edit or Remove an Event
To edit an event, click it on the calendar. The same window opens with the event’s current settings. Make your changes and click Save changes.
To remove an event, open it and click the red Remove Event button.
Was this article helpful?
That’s Great!
Thank you for your feedback
Sorry! We couldn't be helpful
Thank you for your feedback
Feedback sent
We appreciate your effort and will try to fix the article