|
|
Setting Up Your Lesson Logs |
Setting Up Your Lesson Logs
Before you can log lessons, you’ll connect each of your classes to the courses you teach. It takes two quick parts: make sure your Classes exist, then add a log to each one.
Step 1: Make Sure Your Classes Are Set Up
The Lesson Log stays blank until you have Classes, so this comes first. You need at least one Class to set up logs – even a Class with no students works.
Where your Classes come from depends on your school:
- If your district rosters through an SIS and uses an LMS other than Google Classroom, your classes could already be there. Go to the Classes tab on your Left Navigation bar to check.
- If you use Google Classroom, sync it with your Classes page.
- If neither applies, create your Classes manually.
For the full walkthrough, see Sync or Add New Classes (Set Up Classes and Students).
Step 2: Open Set Up Lesson Logs
You can open the setup window from either place:
- On the Lesson Log page, click the green + Set Up Logs button in the top right.

- On the Classes page, go to Setup Classes and Students (the settings wheel) and click + Set Up Lesson Logs.
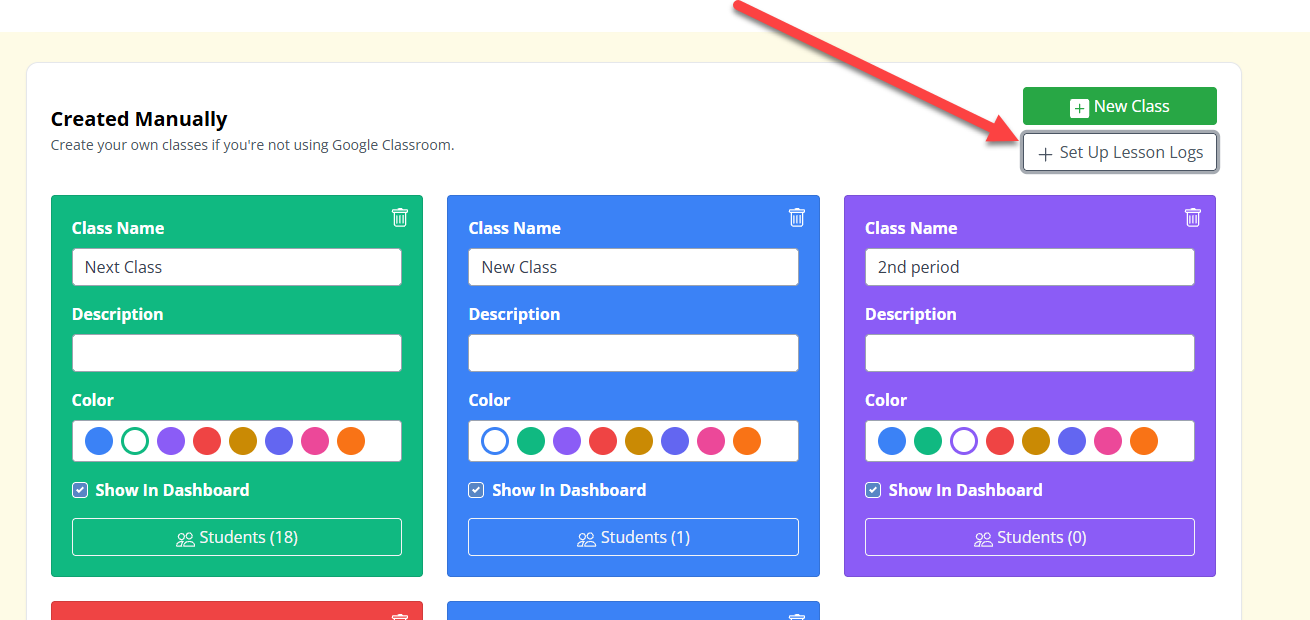
Either way opens the same Set Up Lesson Logs window, which lists each of your classes in the same colors they use on your Classes page.
Step 3: Add a Log to a Class
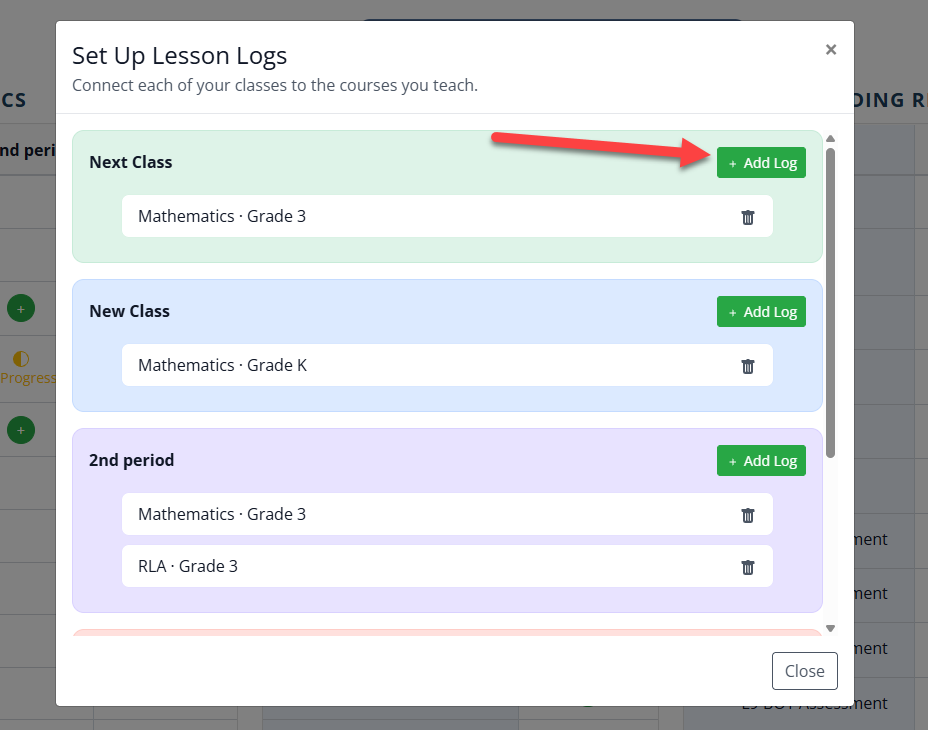
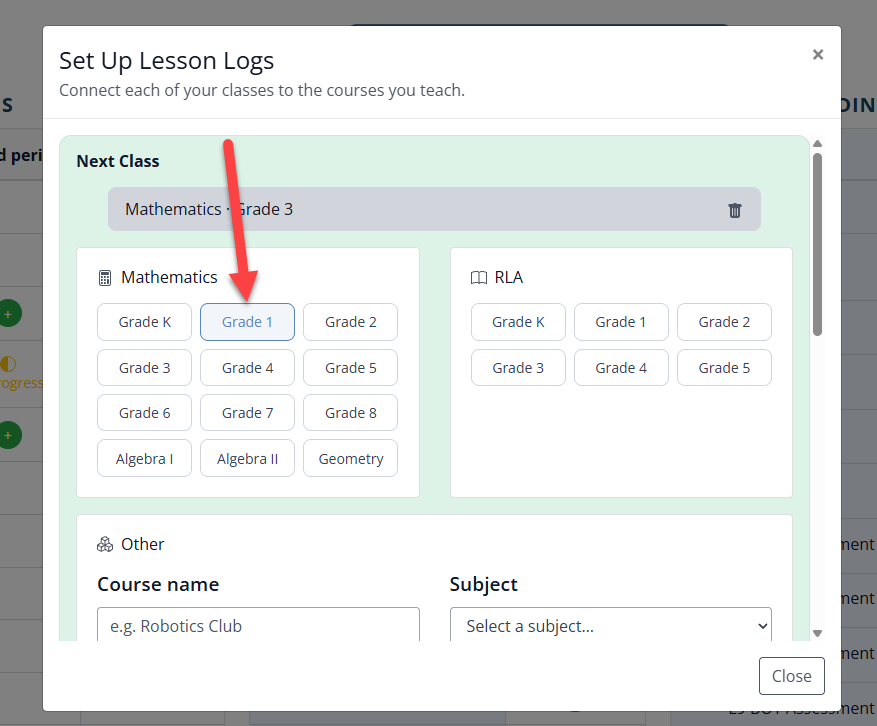
Find the class you want, then click + Add Log and choose the course(s) you teach in that class:
- Mathematics – pick a grade, from Grade K through Geometry.
- RLA – pick a grade, from Grade K through Grade 5.
- Other – type a Course name (for example, Robotics Club) and pick a Subject from the dropdown: Mathematics, Reading Language Arts, Spanish Language Arts, Science, Social Studies, Physical Education, Fine Arts, or Other.
You can add more than one log to the same class. Select Math and RLA together for a self-contained class such as Kindergarten, 1st grade, or an inclusion class. (For RLA in Grades K–3, you’ll be adding both a Reading and a Foundation Skills log.)
 |  |
Step 4: Click Add
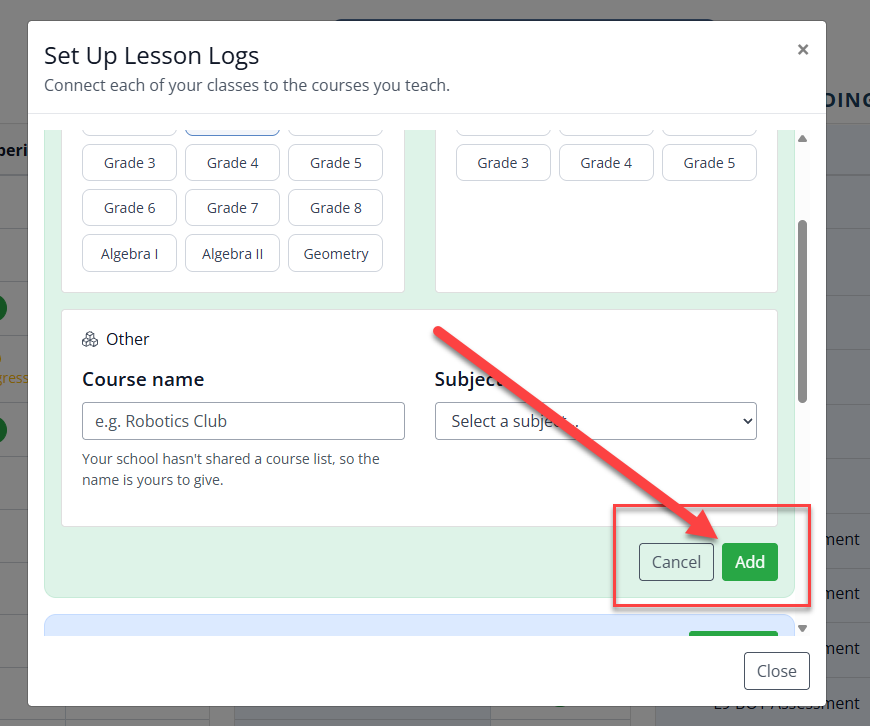
Do This for Each Class
Repeat for every class or period you teach – set up one class at a time. Each log is only about three clicks, so even six periods go quickly. When you’re finished, click Close.
Your classes and their lessons now appear on the Lessons tab, ready to log.
Was this article helpful?
That’s Great!
Thank you for your feedback
Sorry! We couldn't be helpful
Thank you for your feedback
Feedback sent
We appreciate your effort and will try to fix the article