|
|
Adding Audio to an Activity - Record Your Own or Upload |
Adding Audio
Add audio to an Activity by recording it in Classwork.com (up to 5 minutes) or uploading a file. Students play it while they work.
Flex Editor
- Click + Add.
- On the Add Item tab, under Content, click Audio.
- In the Add audio window, record or upload (see below), then click Add Audio to Activity.
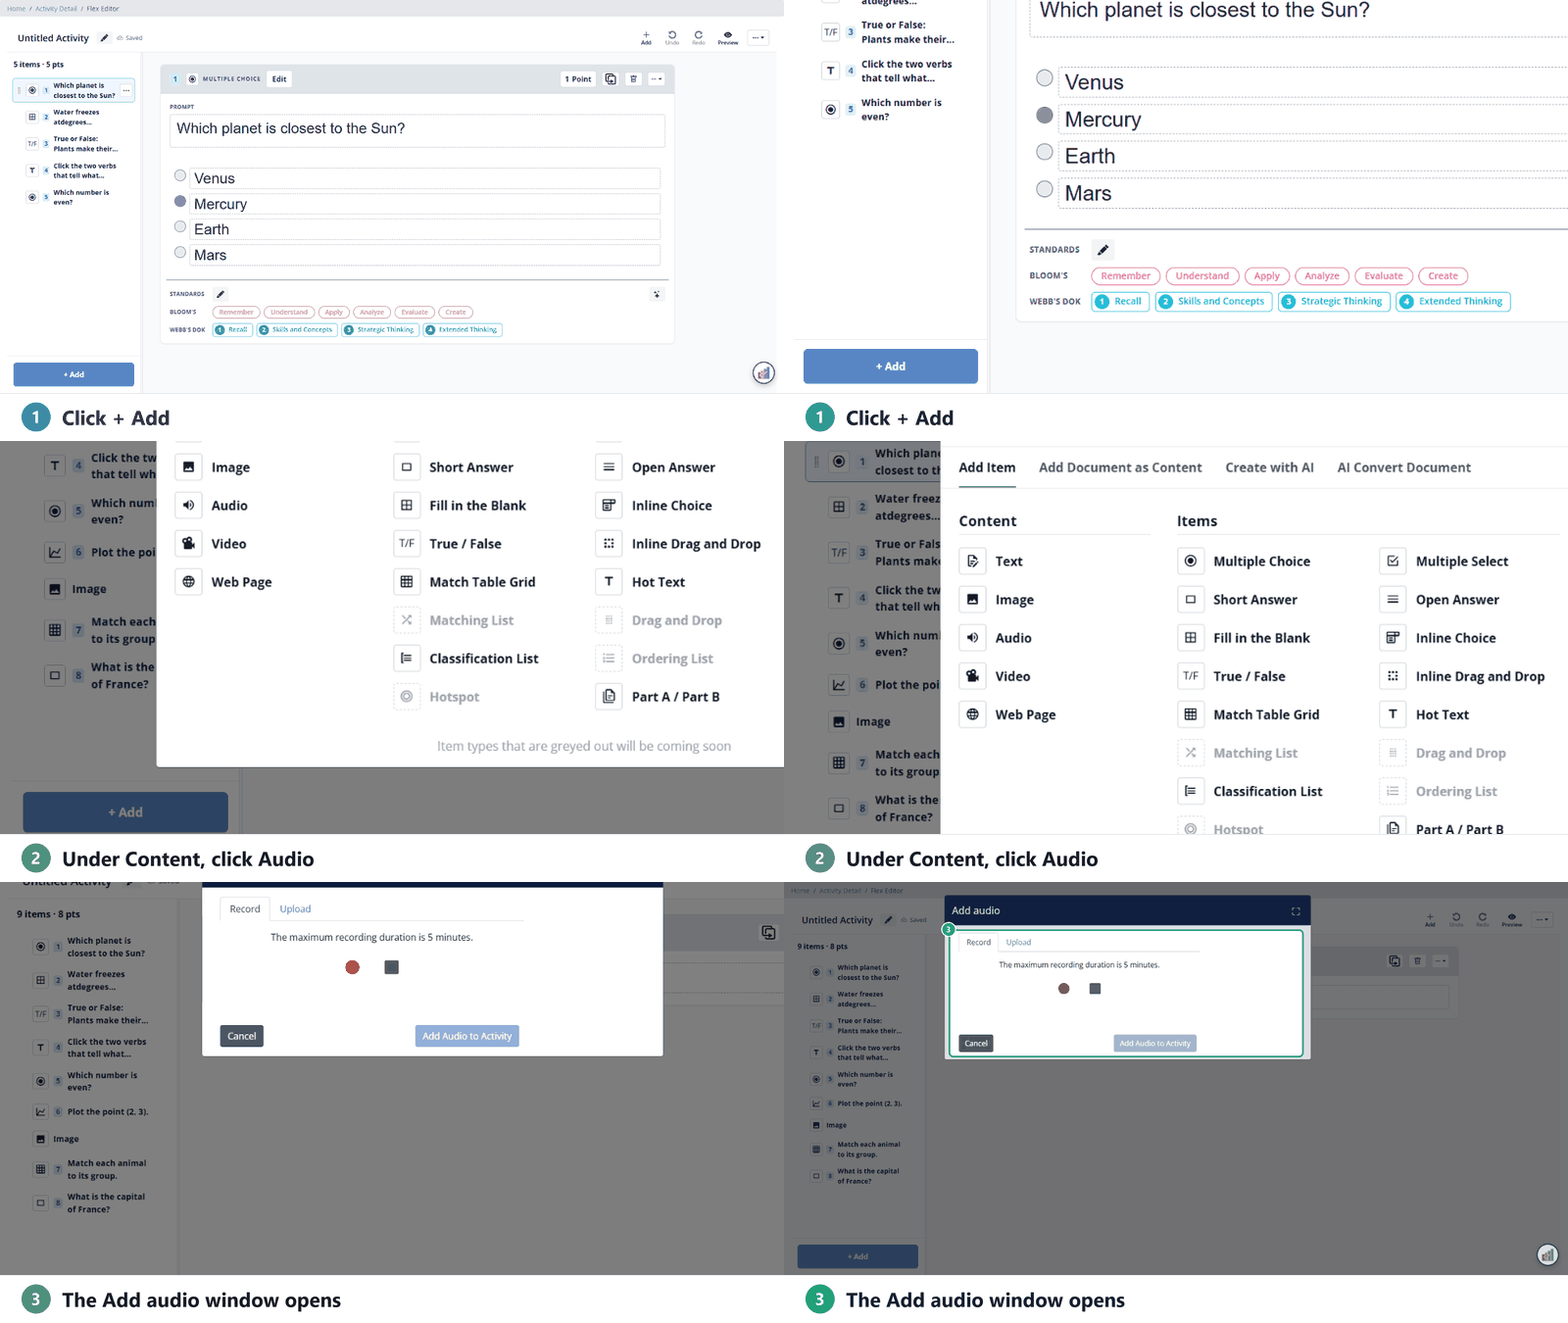
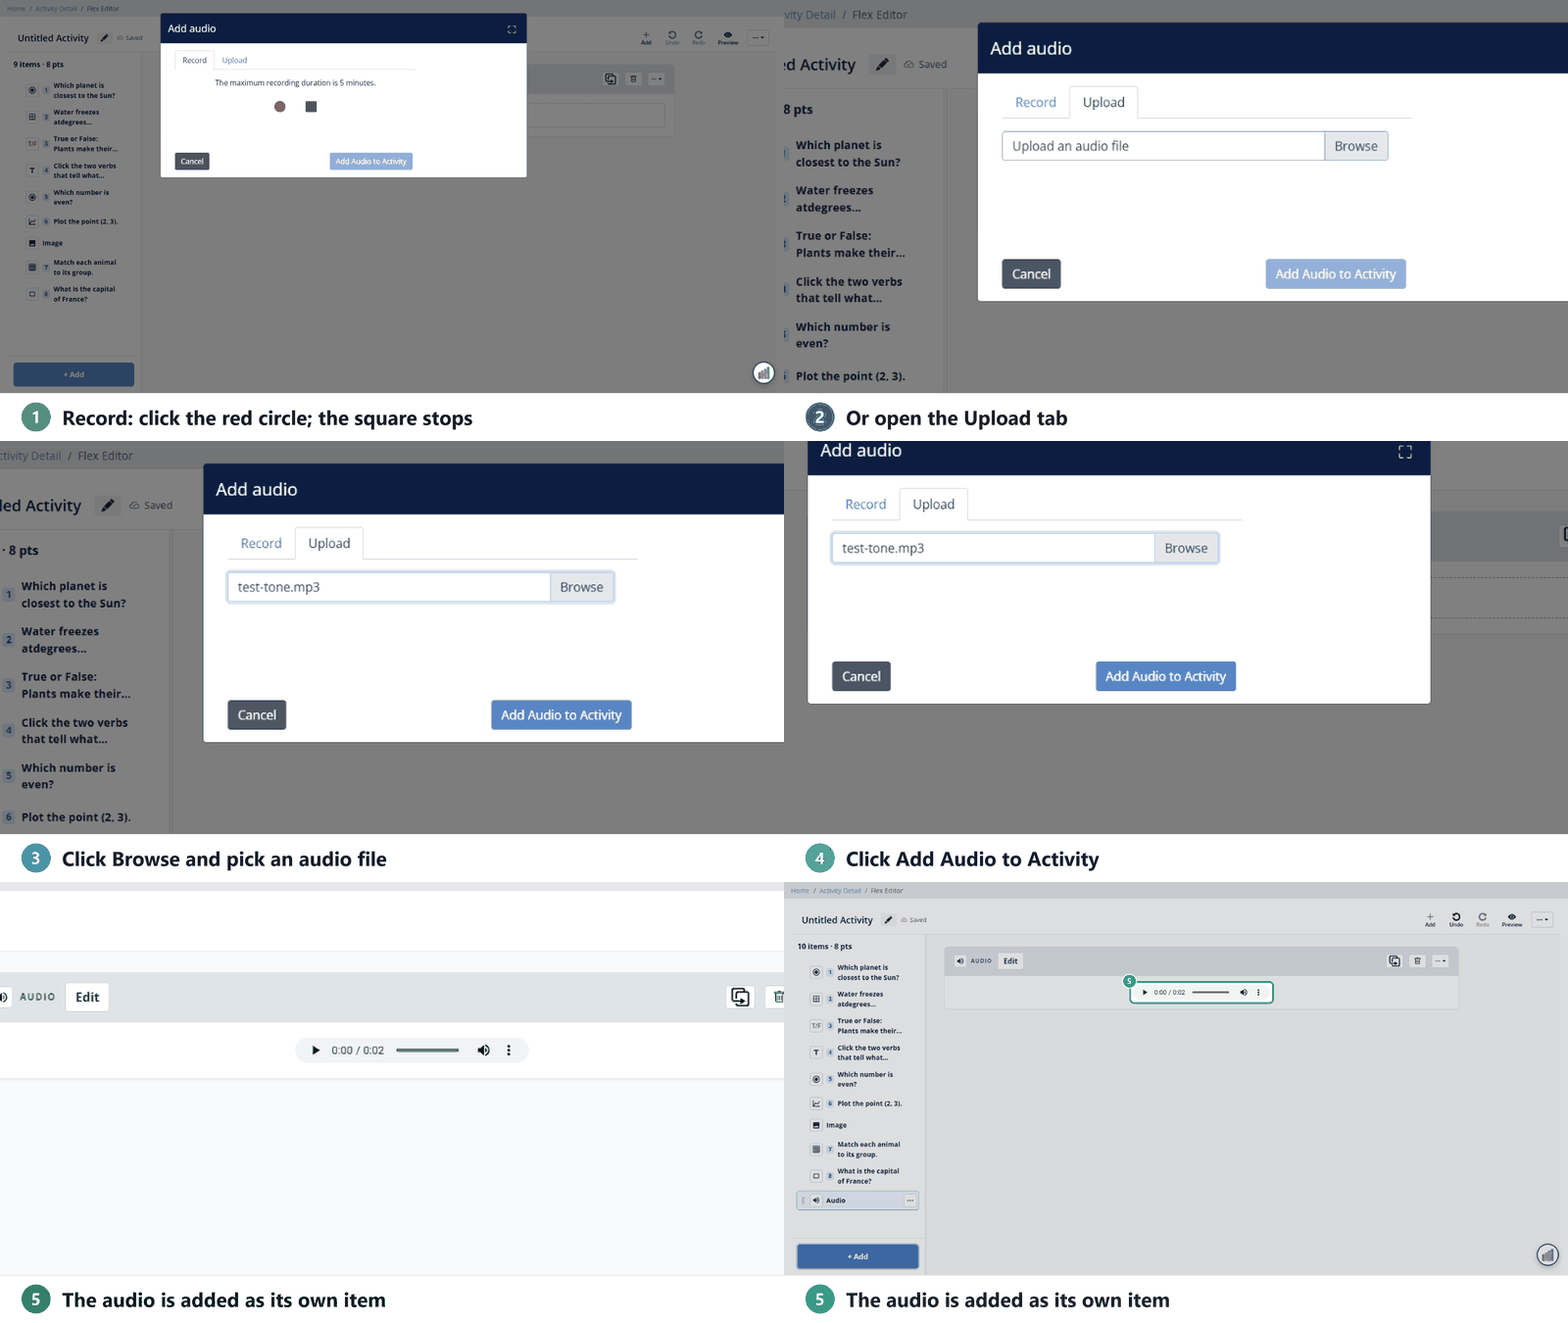
The audio is added to your Activity as its own item. It shows “Processing audio...” for a moment, then a player.
Slide Editor
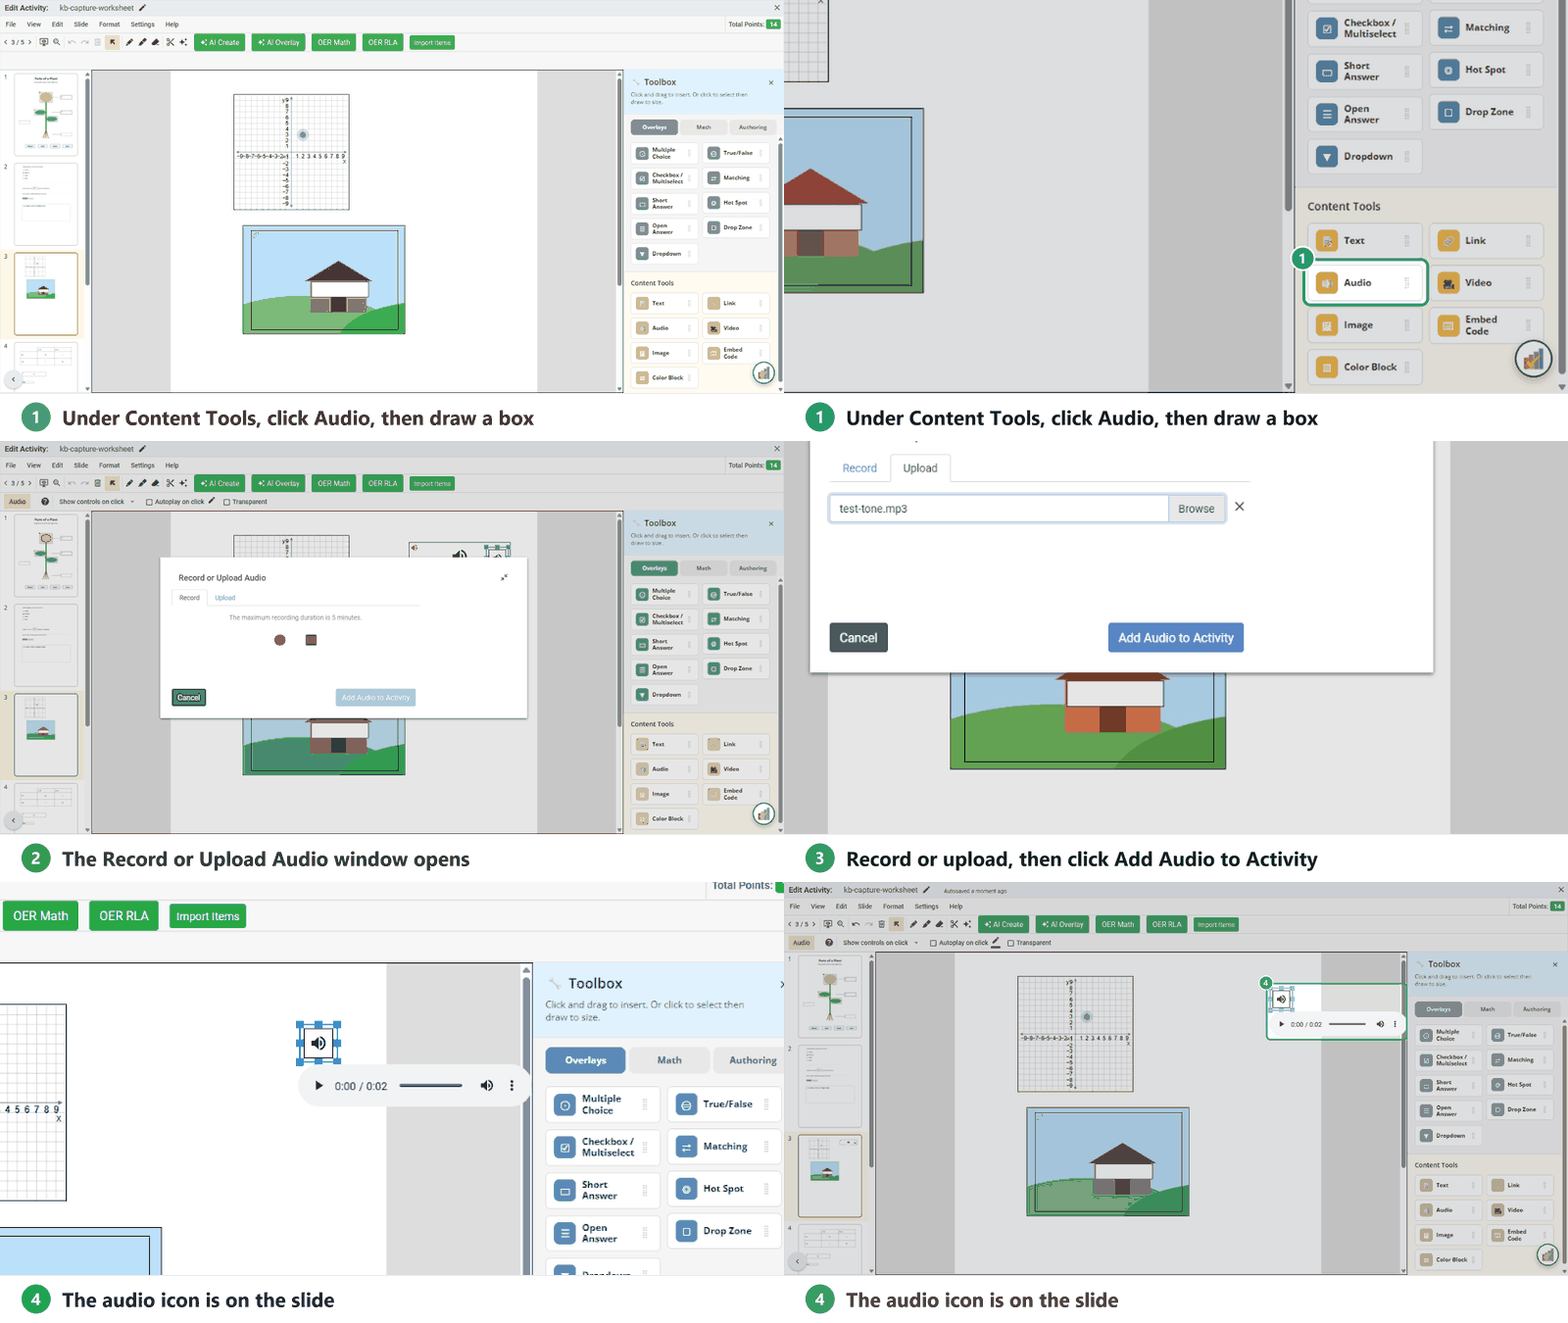
- In the Tool Box on the right, under Content Tools, click Audio.
- Click and drag to draw a box where the audio icon should go.
- The Record or Upload Audio window opens. Record or upload, then click Add Audio to Activity.
Record or upload (both editors)
Record
- On the Record tab, click the red circle to start.
- Click the gray square to stop.
- Click Play to listen. To try again, click Cancel and record again.
- Click Add Audio to Activity.
Upload
- On the Upload tab, click Browse and choose the file.
- When its name shows in Upload an audio file, click Add Audio to Activity.
Common audio formats such as .mp3 work.
Check it in Preview
Click Preview and play the audio. To redo a recording, delete the audio and add it again.
Slide Editor audio options
Click the audio on the slide to see its options in the toolbar: a menu with Show controls on click and Always show controls, Autoplay on click, the border color pen, and Transparent.
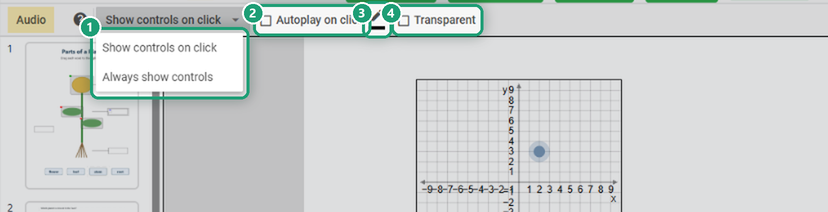
Show controls on click
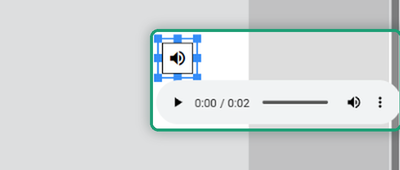
- Students see an audio icon and click it to show the Play/Pause controls.
- The audio stops if the student clicks anywhere else, even into a question.
- Students can move the controls by dragging the dotted area to the left of Play.
Always show controls
- No icon: the Play/Pause controls are always on the page.
- The audio keeps playing when the student clicks elsewhere, until they pause it.
Autoplay on click
The audio starts as soon as the student clicks the icon. They can replay it with Play.
The player you see while editing is an approximation; use Preview to see exactly what students get.
Tip: check Transparent and set the border to No Border to hide the audio over a picture. Then add text telling students to click the picture to hear it.
Was this article helpful?
That’s Great!
Thank you for your feedback
Sorry! We couldn't be helpful
Thank you for your feedback
Feedback sent
We appreciate your effort and will try to fix the article