|
|
Using the Checkbox / Multiselect Question Type |
Checkbox / Multiselect and Multiple Select
A multiselect question works like Multiple Choice, but it can have more than one correct answer, and students check every answer that applies. In the Flex Editor it’s called Multiple Select. In the Slide Editor, the Checkbox / Multiselect tool draws checkboxes on top of your page.
Flex Editor: Multiple Select
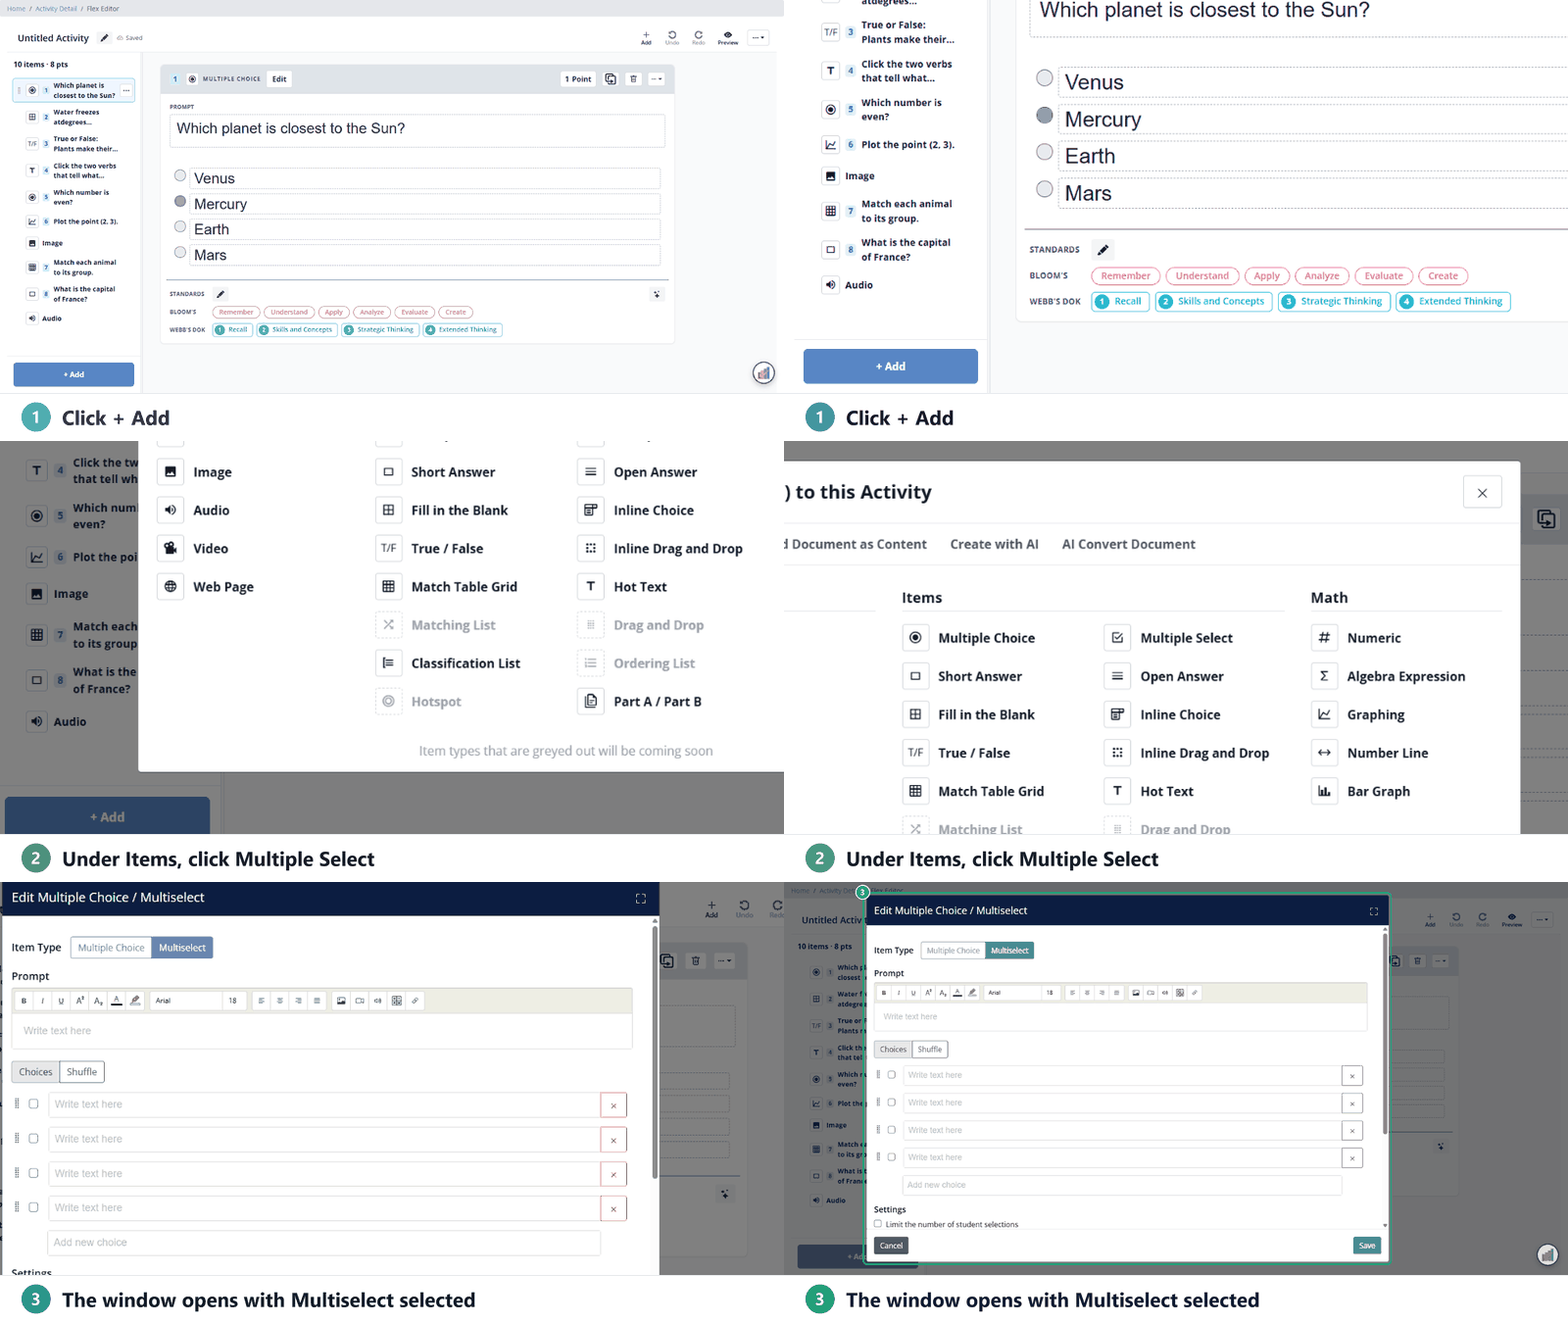
- Click + Add, and on the Add Item tab, under Items, click Multiple Select.
- The Edit Multiple Choice / Multiselect window opens with Multiselect selected. Type the question in Prompt.
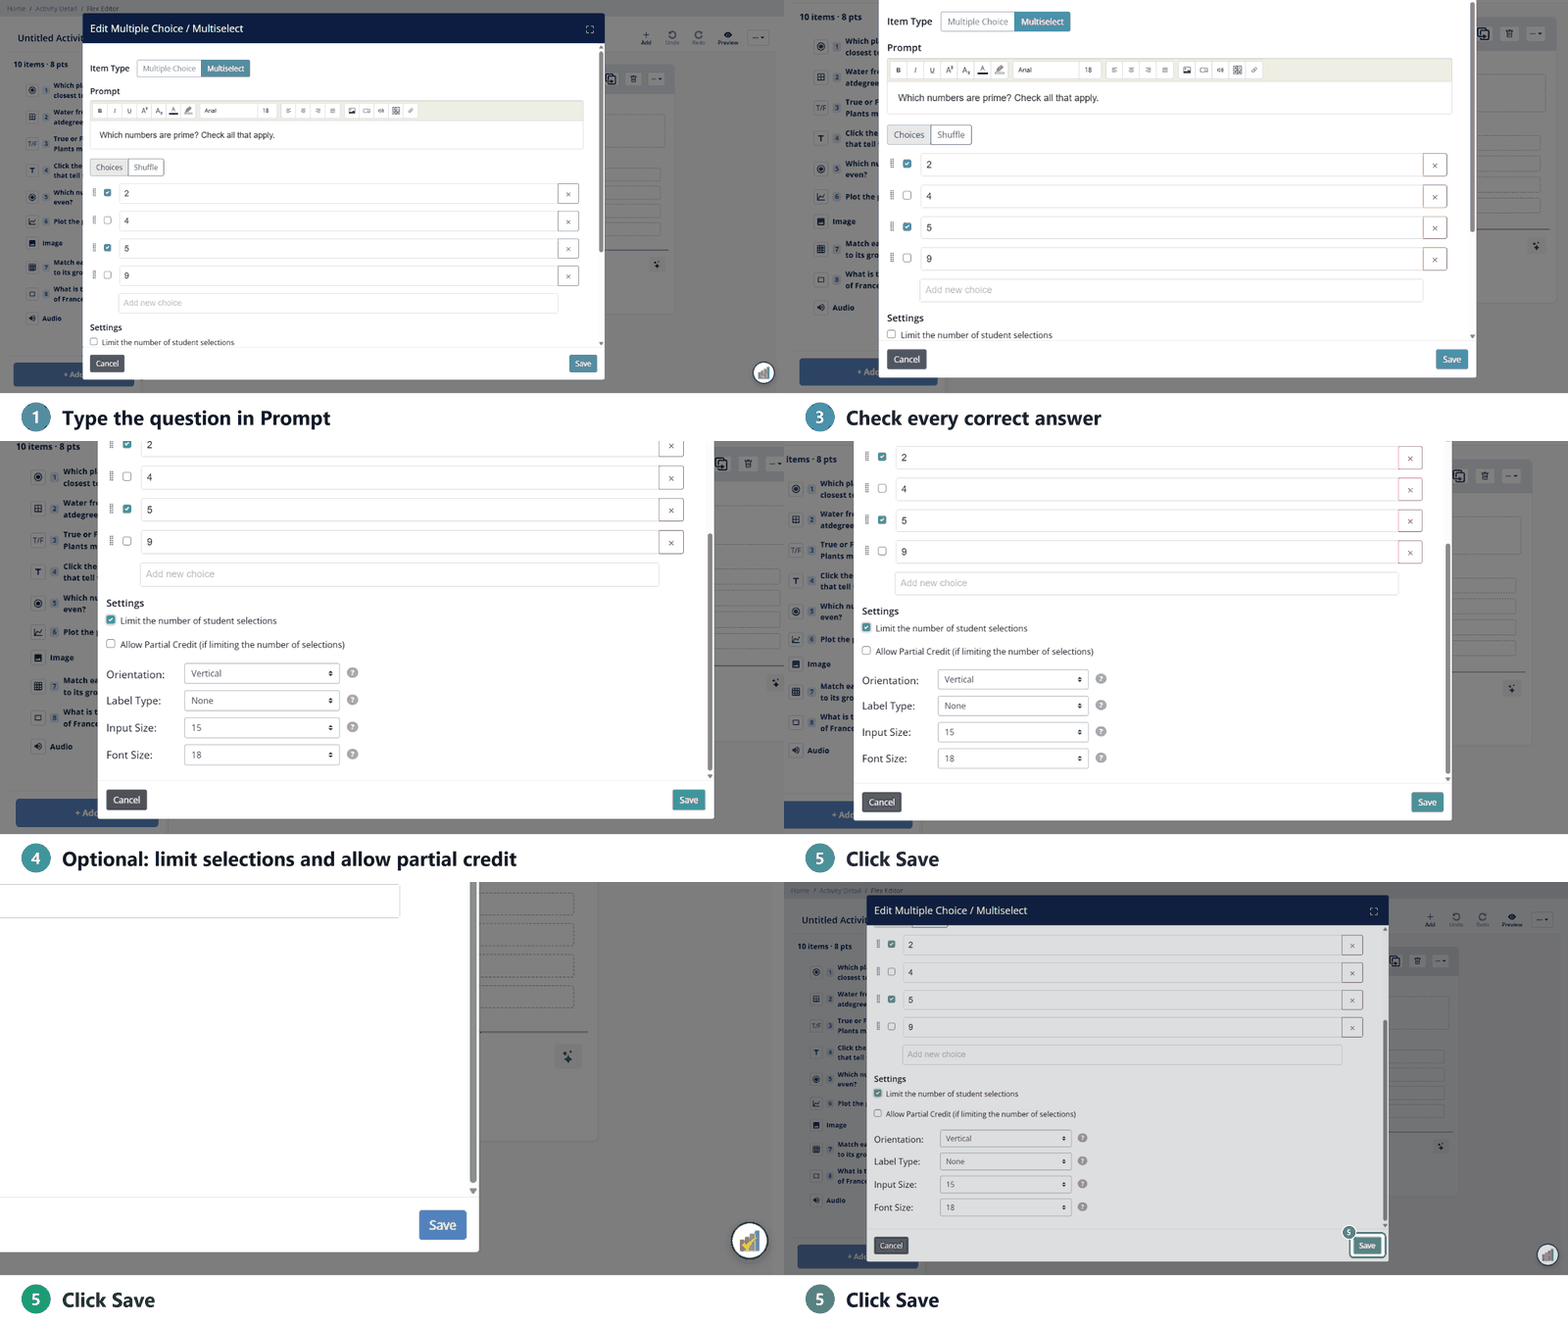
- Type the answer choices. Click Add new choice for more, or the × to remove one.
- Check the box next to every correct answer.
- Optional: under Settings, check Limit the number of student selections, then Allow Partial Credit.
- Click Save.
For the full set of options (shuffle, limiting selections and partial credit), see Creating Multiple Choice or Multiselect Question from Scratch.
Slide Editor: Checkbox / Multiselect
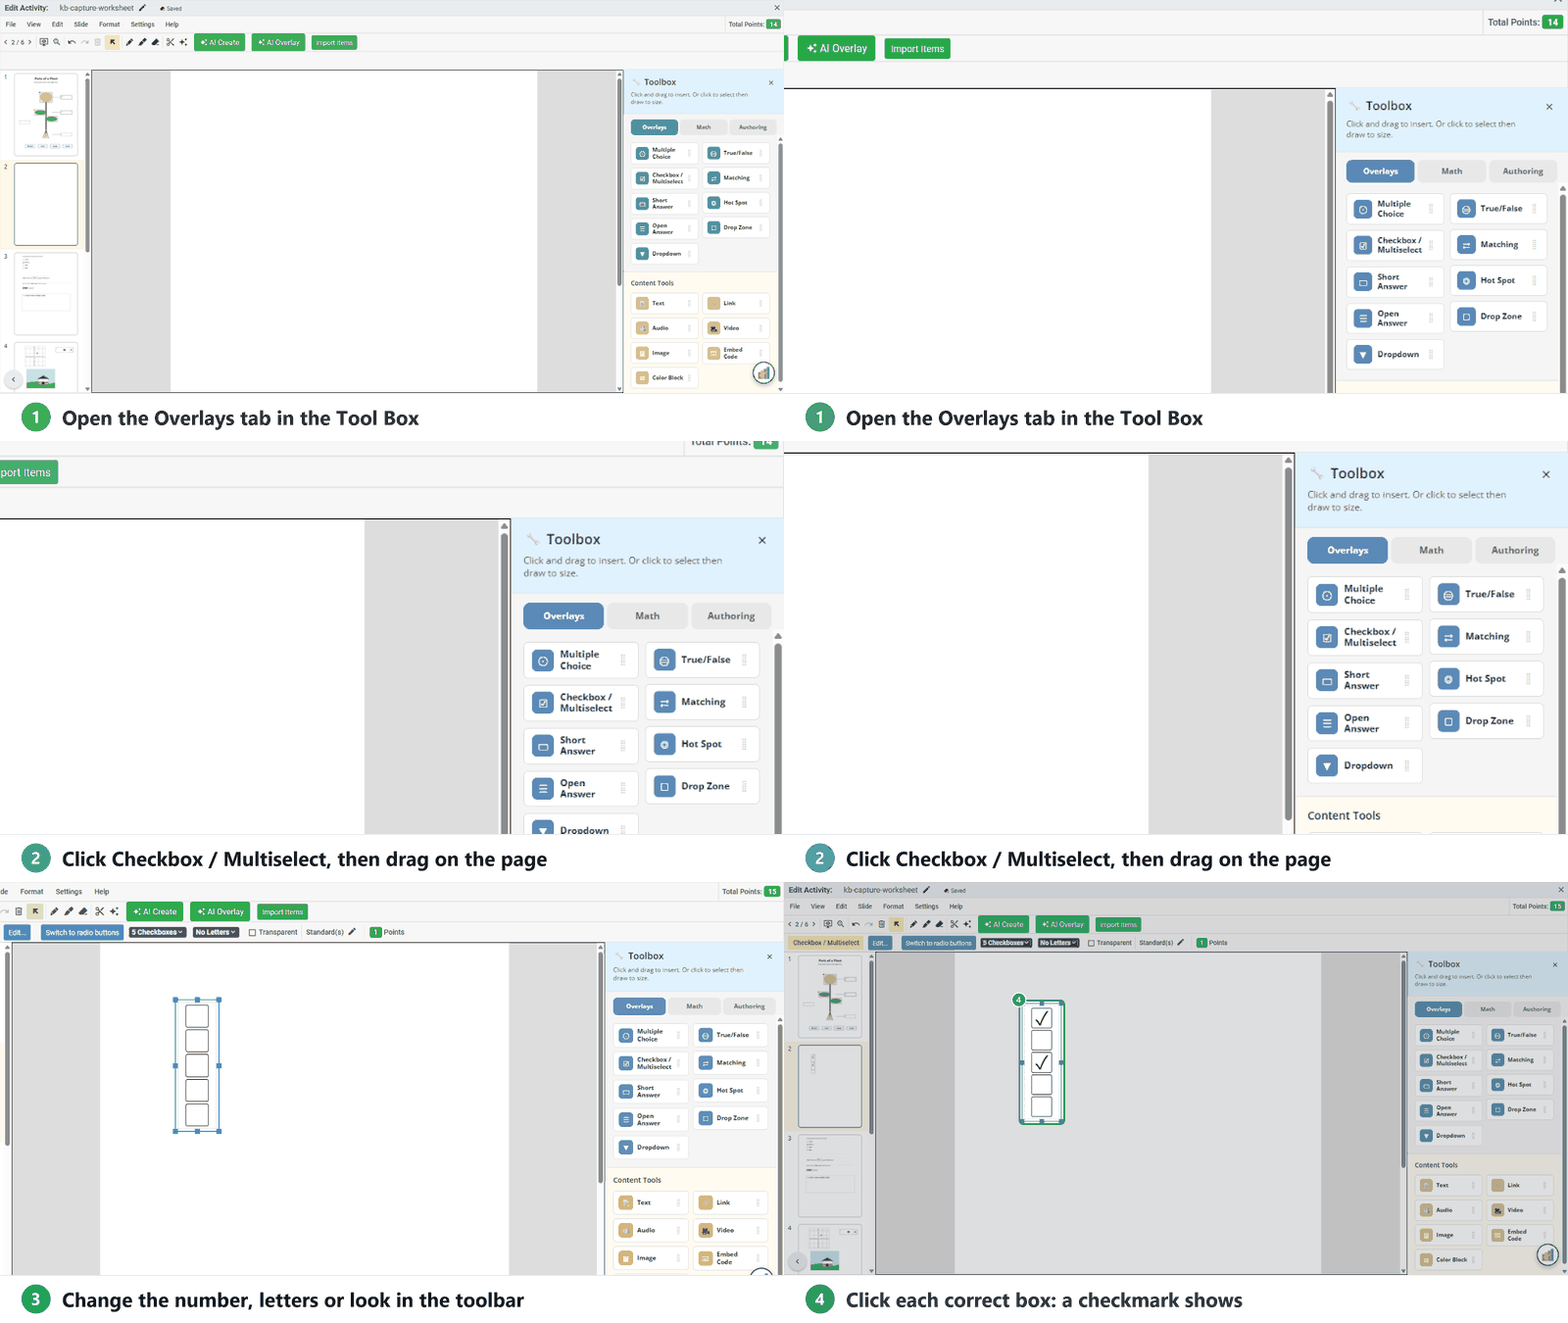
- In the Tool Box on the right, on the Overlays tab, click Checkbox / Multiselect.
- Click and drag on the page. Five checkboxes appear.
- Click the boxes that should be correct. A checkmark shows each correct answer.
- The toolbar changes the number of boxes (5 Checkboxes), adds letters (No Letters), or turns them into radio buttons (Switch to radio buttons).
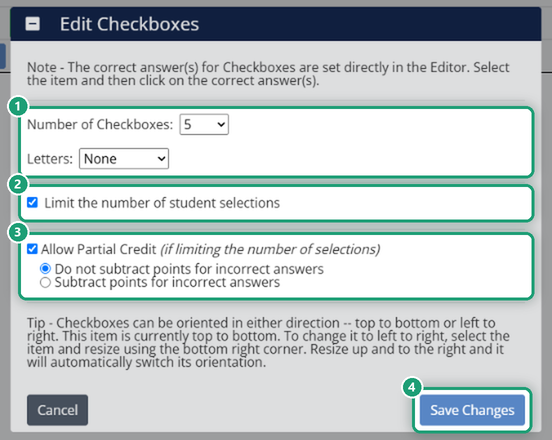
- For scoring settings, select the item and click Edit... in the toolbar. The Edit Checkboxes window opens.
Edit Checkboxes settings
- Number of Checkboxes: how many boxes appear. To switch between a vertical and a horizontal layout, drag the bottom-right corner of the item.
- Letters: add letters or numbers inside the boxes.
- Limit the number of student selections: for example, five choices with two correct answers, limited to two.
- Allow Partial Credit: students earn part of the points for some of the correct answers (2 of 3 correct earns 2/3 of the points). It stays greyed out until you check the limit on selections.
- With partial credit on, choose Do not subtract points for incorrect answers (the default) or Subtract points for incorrect answers, so each wrong selection lowers the score and discourages guessing.
Click Save Changes when you’re done.
Tip: checkboxes on a PDF
If your PDF already has lettered answer choices, cover the old letters with the Color Block tool so they don’t show behind the new checkboxes. See Using the Color Block Tool.
Was this article helpful?
That’s Great!
Thank you for your feedback
Sorry! We couldn't be helpful
Thank you for your feedback
Feedback sent
We appreciate your effort and will try to fix the article